Yoga for Nervous System Regulation | Spring Class 13
In This Series
New here? Read this first!
Yoga for Nervous System Regulation is a unique program combining yogic tradition with neuroscience to help students engage with the nervous system, calm stress responses, and cultivate peace and resilience in body and mind. Learn more about the program here.
Here’s what you need to know to get the most out of this practice.
- Please complete the entire Spring Series in order before moving on to subsequent series, regardless of the current season. Each series builds upon the material covered in previous seasons, so doing them in sequence is important for your understanding and your safety.
- Yoga is best practiced on an empty stomach, which means no food for 2 hours prior and no beverages for 30 minutes prior. Follow your practice with food and plenty of water. Review the complete Yoga Safety Tips here.
- Each weekly class consists of a playlist of 3 practices to be completed in order. The asana (yoga poses) prepare us for pranayama (breathwork) which prepares us for meditation, which prepares us for life!
- This course is designed to accommodate a range of learning styles. Below the video playlist you’ll find additional visual aids and links to resources that enhance the learning experience.
- Yoga is a very individualized experience, and it’s normal to have questions or concerns. I would love to hear yours! Please submit a comment at the bottom of the page, or follow KMKyoga on Instagram, where I share additional insights, support, and resources with a growing community of fellow practitioners.
Thanks for being here!
Welcome to Class 13 – the final class of the Spring series! We’ll introduce the final niyama, ishvara pranidhana which I translate to mean “the power or agency to devote care to your own life.” We’ll fully integrate our breath with yoga movements, particularly in supine (lying down) poses. In pranayama, we’ll get to the heart of why it’s sometimes hard to honor our own needs, and cultivate a habit of using the breath to check in with our nervous systems regularly in our daily life. We’ll end with a meditation on the stillness between inhales and exhales, and the peace that can be found there.
Remember, yoga is best practiced on an empty stomach. Review the complete Yoga Safety Tips here.
Please don’t hesitate to ask questions in the comments section at the bottom of the page, or by sending me an email at kath@kmkyoga.org. I’m happy to help with clarifications or modifications to ensure your practice is safe, comfortable, and enjoyable.
Find a quiet space with room to move. You may wish to pause notifications on your digital device. Gather your mat, a sturdy chair, some water, and a blanket. When you’re ready, hit Play on the first video in the playlist – asana – to begin.
Enjoy your practice, and I hope you’ll continue on to the Summer Series!
In This Series
This course is provided on a pay-what-you-can basis. If you value what you find here and want to contribute, make a donation. If you’re not able to donate today, please join us for free.

Get course updates, news, and insights about yoga, meditation, neuroscience, and more in your inbox.
Spring Class # Video Instruction13
Each class playlist consists of three videos to be practiced in order:
Asana ➙ Pranayama ➙ Meditation
The purpose of asana (yoga pose or “seat”) and pranayama (breathwork) are to prepare the body and mind for meditation, where the real magic happens! I strongly suggest you try the classes in sequence, but after you’ve completed the entire sequence at least once, feel free to revisit individual parts as you’d like.
Once you complete a video, the player will automatically advance to the next one in the playlist. You can skip to the next video at any time using the next/previous arrows at the bottom of the player window, or by clicking the icon in the top right corner.
Asana (Pose) Descriptions
The following diagrams are offered as a supplement to today’s asana practice. Use them to quickly reference specific poses in the video, review verbal instructions in written form, and clarify details from the class. Scroll within each text box for transcript excerpts with time stamps indicating when each pose is demonstrated in the Asana Video for today’s class.
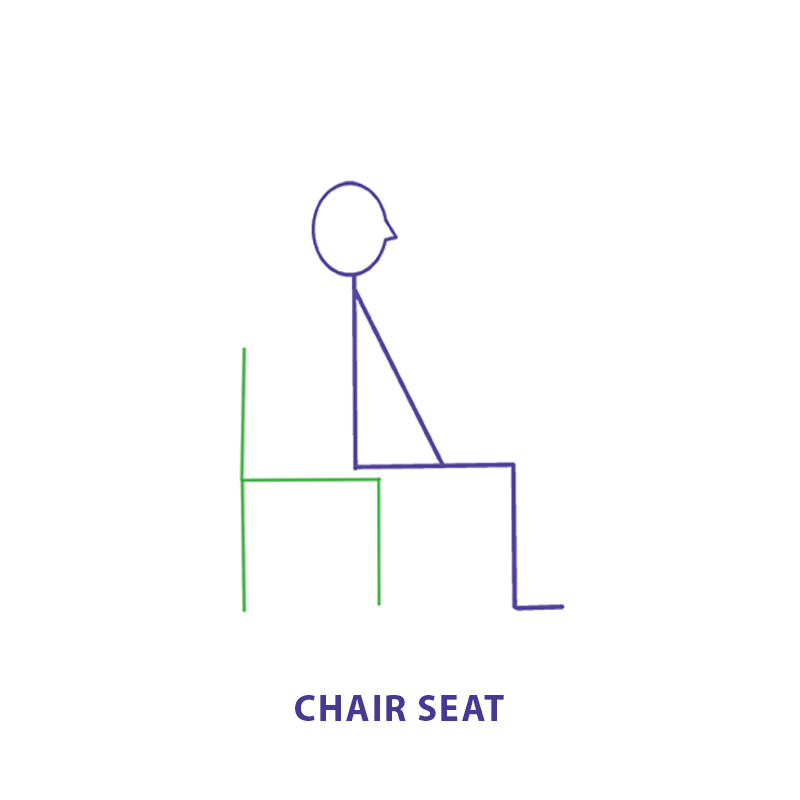
00:05:19:11 – 00:05:43:22
Find your seat again. Come forward. It’s the same seat. Sits-bones. Thighs are free of the chair, knees and feet are hip width apart. Feet are parallel and your heels are over top of your knees. Take a long, gentle inhale. Oh, I forgot something. Pull your feet in. Stack your pelvis. Let your spine stack up long and tall.
00:05:43:22 – 00:05:56:22
So make sure that you’ve got your seat, pull your feet towards you, angle that pelvis, lift your chest not your ribs but your chest.
00:05:57:00 – 00:06:25:18
Your chin will come up a little bit. And this is very important. This positioning, because we are a culture that drives and types and reads. And when we do that, we’re almost making a fetal curve to our spines. Spines can’t sustain that for long without it congesting organs and changing how your structures support each other. So we want to practice a nice long spine.
00:06:25:18 – 00:06:49:11
Pull the feet in, the pelvis tilts. That creates your lumbar curve. You’re meant to have a little bit of a chest, upper back curve, and then the cervical curve goes the opposite direction. These are all the curves that we learn when we’re a baby. First we learn to lift our head. That’s the cervical curve. Then we learn to sit up.
00:06:49:14 – 00:07:15:15
That’s the kyphotic curve. When we learn to stand up that’s the lumbar curve developing. So find that curve in your body and then take a long gentle inhale. And on exhale close your eyes if that’s comfortable. If not leave slits to just look at your hands in your lap. Bring your attention to the breath in your nose.
00:07:15:20 – 00:07:25:12
Just feel it. The temperatures, the textures, the moisture, even maybe.
00:07:25:13 – 00:07:35:05
Bring your attention to the breath moving through your throat.
00:07:35:07 – 00:07:42:01
Chest.
00:07:42:03 – 00:07:47:17
Belly.
00:07:47:18 – 00:08:04:15
And then the little triangle. Feel your diaphragm go up. Go down with inhale, up with exhale.
00:08:04:17 – 00:08:11:17
Feel your whole torso breathe.
00:08:11:19 – 00:08:29:14
And with your next inhale bring eyes open. Take a moment. Notice how you feel just from that simple breath practice and remember that’s a good breath practice to use if you’re feeling irritable or if your nervous system is overstimulated.
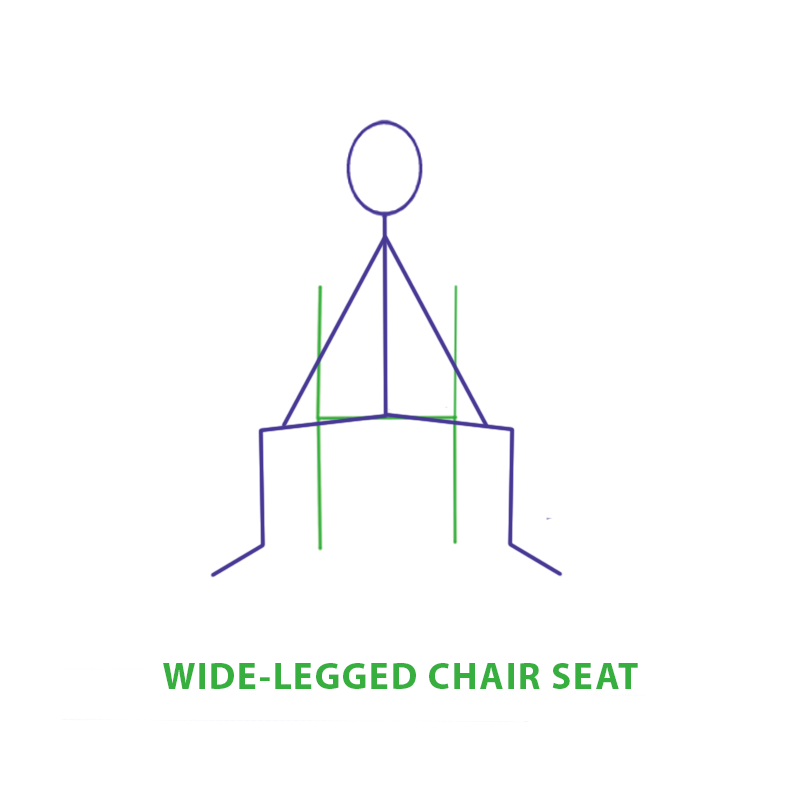
00:08:29:14 – 00:08:39:15
So let’s check out our backs. We’re going to go wide. Remember you want your thighs and knees to point right at the second space between second and third toe.
00:08:39:17 – 00:09:10:05
Same on both sides. Hands are on your thighs and we still have that nice long spine which we’re going to keep straight as long as we can inhale here. And then hinging at the hips, exhale down. When you can’t go any farther begin to hang. Bring your attention to the breath moving your belly and take a nice long inhale.
00:09:10:07 – 00:09:38:15
On exhale soften that lower belly and let the spine hang from the tailbone. Feels like it becomes a little longer. Maybe you feel the stretching in a very satisfying way. Bring your attention to your upper belly as you inhale. And on exhale soften that upper belly completely. Now everything from the ribs to the tailbone is hanging from the tailbone.
00:09:38:15 – 00:09:47:13
Now your next inhale, focus on your chest and upper back.
00:09:47:15 – 00:10:15:07
And on exhale, soften: low belly, upper belly, chest. Release your neck. Let your head hang and then press down with the feet. Straighten and inhale your way up. Notice how you feel as you walk your feet back in.
00:10:15:09 – 00:10:38:13
And on exhale, soften. Low belly, upper belly, chest. Release your neck. Let your head hang and then press down with the feet. Straighten and inhale your way up. Notice how you feel as you walk your feet back in.
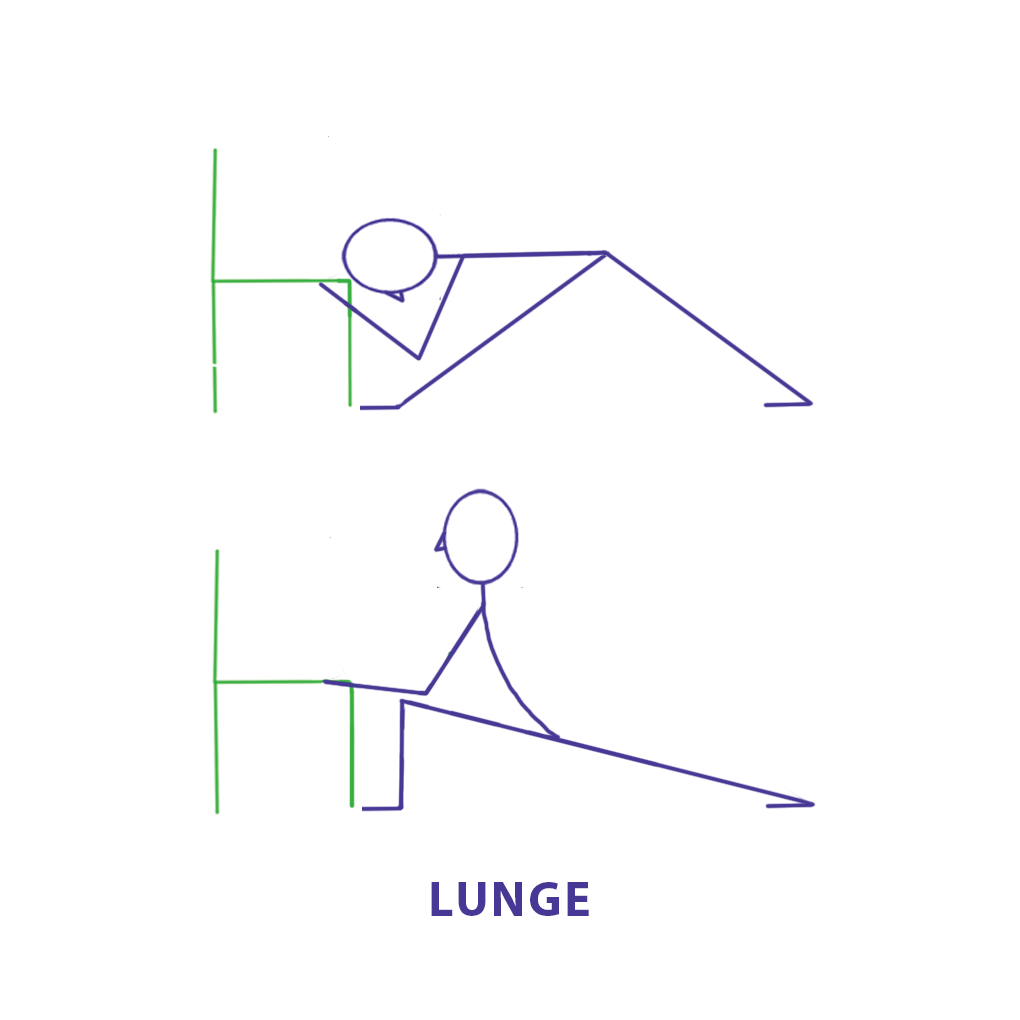
00:10:39:08 – 00:10:49:21
Okay I’m going to spread out my mat and move my chair.
00:10:53:02 – 00:11:07:19
The legs at the front of the chair are anchoring my mat. Your chair will be strong and steady and it will also be pushed up against something sturdy. So check out your breath
00:11:07:19 – 00:11:34:09
ratio that you have today. Maybe it’s a 3 3. Maybe it’s a 4 4. Maybe it’s 5 5. Whatever works for you, because you’re going to need to know that in a minute. We’re going to add the half, do the half sun salutation and add in the little back and forth stretch that feels so nice. And it’s really, really accentuated by breath awareness.
00:11:34:11 – 00:12:08:21
So my feet are hip width apart. I’m very close to my chair. Exhale here. I’m going to use a four count. Inhale 2 3 4. Sticking your bottom out. No sense of falling. Exhale 2 3 4. Take hold and soften your belly. Let the air go so that you can really hang for a moment. Shift your weight to one foot and inhale 2 3 4.
00:12:08:23 – 00:12:56:23
Exhale 2 3 4. I’m straightening the front leg as much as possible. Back leg is staying straight too. Inhale 2 3 4. Exhale 2 3 4. Inhale 2 3 4. I’m going to come out with this one. Exhale 2 3 4. And jump in. Hang. Let go of all of your air. Inhale up. And exhale down. I’d like you to pause the video and do as many of those as you need to feel
00:12:57:01 – 00:13:21:07
the stretch, to get the joy out of it. And then when you finish one side, I want you to do the other side for about the same amount of time. So pause the video. Do a series, equal numbers. If you do five on one side, do five on the other side, and then notice how you feel, come back and I’ll ask you about it.
00:13:30:03 – 00:14:05:16
So take a moment to notice how you feel. Notice what your breath is doing. Notice any parts of your body that want to have a little conversation with you. And we’ll move on to a pose on the floor that’s also a really interesting use of breath. Breath has four components. There’s inhale, the pause after inhale, then exhale, then the pause after exhale.
00:14:05:18 – 00:14:30:01
We start with inhale and exhale which is the first and third phases of breath. And then if we’re going to add anything next, we go to the pause after exhale. The pause after inhale, it’s very stimulating. And I don’t use that in early practices very much at all. So we’re going to lie on the floor and do a pose.
00:14:30:03 – 00:14:45:00
And if your breath practice is maybe in 4 4 or 5 5, you can experience the pause after exhale. If that’s uncomfortable, don’t do it. But I wanted you to understand the four components of breath.
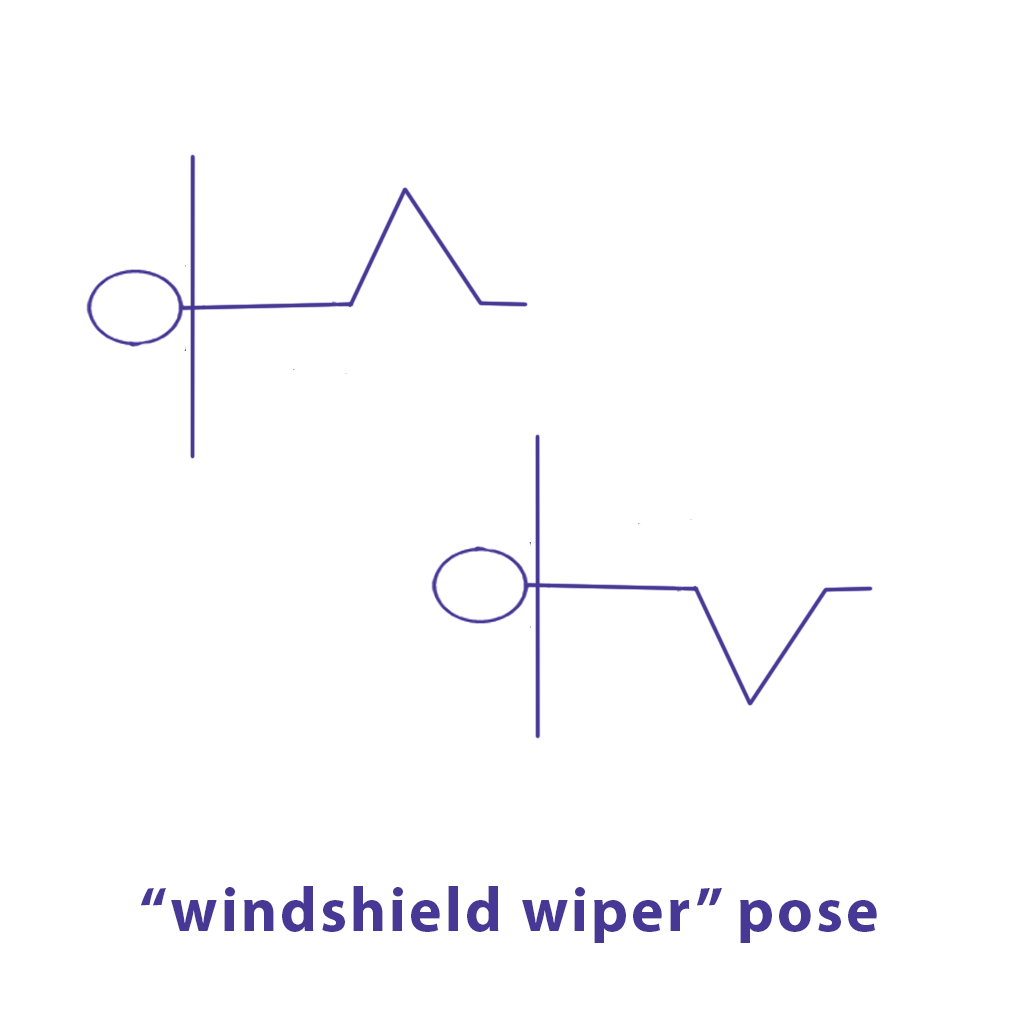
00:14:41:00 – 00:14:48:00
So I’m going to make my way to the floor and ease down so that I am on my back with knees bent and feet flat. Take a moment to just adjust. Take a moment to notice how you feel.
00:15:04:05 – 00:15:27:21
And then bring one knee over your chest, fingers in the knee crease not the outside of the knee, but the knee crease. Rock back and forth to get that back nice and flat. You can hug the knees a little, that can feel good in the lumbar area, and then bring your foot down one at a time. And then the other.
00:15:28:02 – 00:15:53:07
We don’t bring both feet down at the time because that causes a lot of tension in the abdominal muscles that aren’t useful in this particular instance. So I’m going to show you what I’m doing, and I’ll do the breath count for the practice, and then I’ll talk through it again. So my arms are out in a T position, palms down.
00:15:53:09 – 00:16:14:01
You don’t want your arms too high like a Y, and you don’t want your arms too low. If the arms are straight out from the shoulder, then if you need any help to raise the knees back up again, you can push down with the palm and that will help you. It’ll help engage the core to raise your knees.
00:16:14:03 – 00:16:28:11
Walk your knees and feet together. We did this pose at least once before. So I’ll talk you through it without breath and then with breath. So inhale here.
00:16:28:13 – 00:16:55:02
Exhale down to one side. My knees and feet stay together. When I’m here, I soften my belly and relax into this position. Then inhaling the knees back up … if you need to press down with the same side hand, you can. And then exhale takes you down to the other side. Knees and feet stay together.
00:16:55:02 – 00:17:28:13
If your shoulder comes up a little bit, that’s okay. Better that the knees go down. Soften your belly here. And then inhale up, pressing down with that side hand. If you need to. So that’s the movement. We’re going to always exhale down because the exhale is actually a twist. Twists only happen on exhale. It’s like wringing out a dish rag.
00:17:28:15 – 00:18:01:07
You’re definitely expelling things with a twist. You can’t take anything in. So same position. And this time I’ll give you an idea of the count and you can play with it. But watch first. Don’t do along with me this time. So I inhale here, 2 3 4. Exhale 2 3 4. Soften the belly and stay 2 – with no air – 3 4. Inhale up
00:18:01:09 – 00:18:41:12
2 3 4. Exhale down 2 3 4. Soften that belly. Pause 2 3 4. Inhale up 2 3 4. So this is the important part that I want you to really respect in your body. If 4 4 or 5 5 is all you have and you’re uncomfortable pausing after exhale, please don’t. Please be safe. But if you can, if you soften your belly and relax your torso, you very well can probably remain.
00:18:41:12 – 00:19:12:13
If it doesn’t amount to your full count, that’s okay. But notice that space, that relaxation aspect of no breath you have to have to soften your belly first. So try a few of those on your own until you’re really not getting any more joy out of the twist. The twist does wonderful things to the hips and low back, so try that a few times and notice while you’re doing it.
00:19:21:12 – 00:19:41:11
Okay, notice how you feel. What’s your breath doing? Were you able to sustain, or not? Respect it. Respect the body you brought. Okay, let’s move on. I always like to finish that twist with bridge because
00:19:41:11 – 00:19:56:19
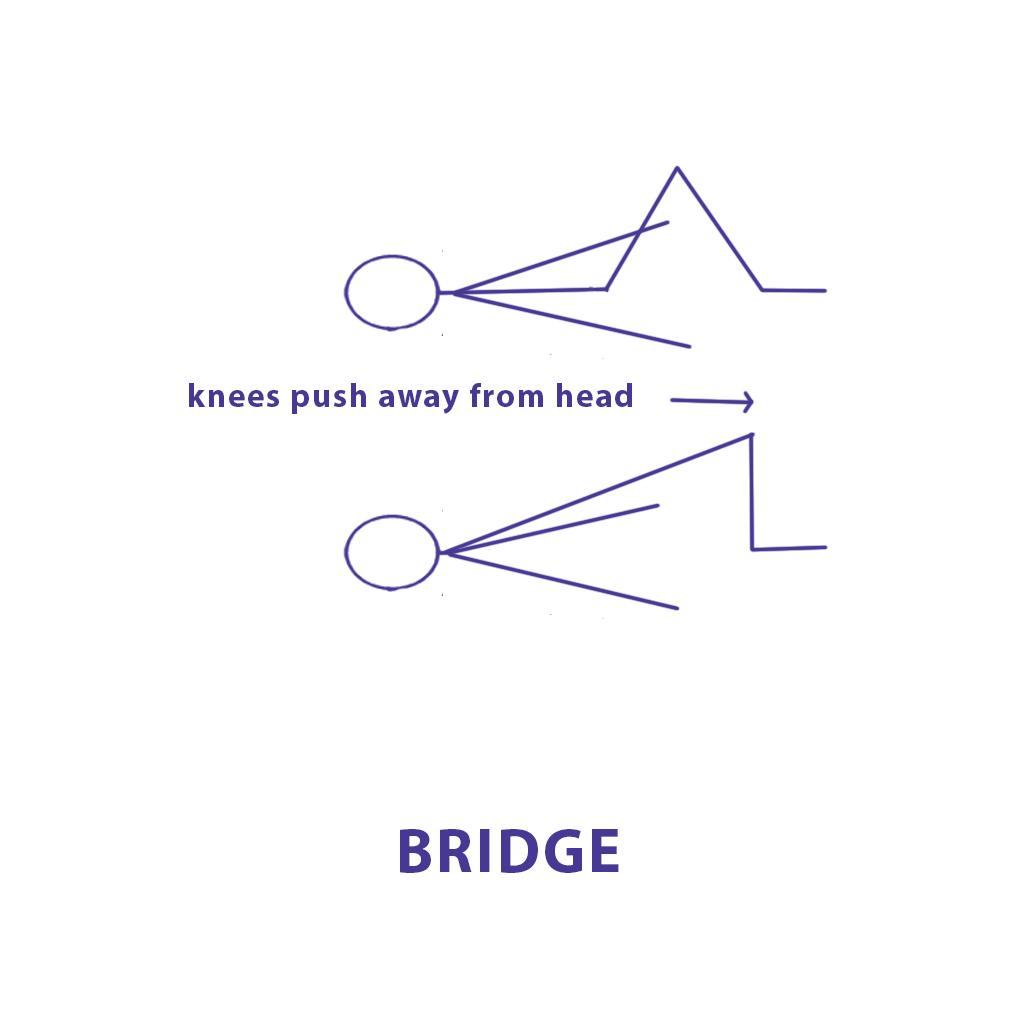
Every yoga pose has to have a counter pose. The counter pose should be in the same orientation. Right now I’m supine and I’ll stay supine for the pose, which was the leg lowers and for the counter pose which is going to be bridge.
00:19:56:21 – 00:20:27:02
And the counter pose should also be a little bit easier then the pose itself and I think if you follow the directions, even if that I give you, even if you struggle with bridge, you will find bridge is easier than it has been in the past. That was my experience anyway. So my arms are now straight alongside my body, palms down my feet and knees are hip width apart.
00:20:27:04 – 00:20:57:05
I’m going to press my feet down into the mat, which will tilt my tailbone up and my lumbar spine presses against the mat. On inhale, the tailbone goes down and the curve in the back is exaggerated. So exhale and you’re not going to put your hands here. I’m just showing doing this so you can see the movement that happens in the spinal arch.
00:20:57:07 – 00:21:27:00
This is the inhale exhale inhale. I teach it with pressing the feet down. But after a time, you’ll be able to rock your pelvis back and forth without your feet engaging. And that’s okay to. So let’s use that for bridge. Your body is essentially a line that’s bent right now. Your thighs are one part of the line. Your torso is the other part of the line.
00:21:27:02 – 00:22:02:11
If you push your knees away from your head, this line will naturally straighten out. And it really is that simple. So I’m going to inhale here. Exhale, press the lower back down. And then inhale, push the knees away and up we come on exhale. Come down one vertebra at a time until your low back hits. And then you’re ready to come up again.
00:22:02:13 – 00:22:25:12
The trick is really … I think for the longest time I thought I was supposed to be lifting my hips or lifting my belly. And that’s really not where most of the effort is coming from. In fact, with bridge, you might even get some, hamstring spasms. And if that happens, this is the the, the absolute stretch for that.
00:22:25:14 – 00:22:41:17
Again, fingers in the knee crease knee as close as you can and just straighten this leg out. It’ll feel so good if you’re getting a little hamstring spasm from bridge. But that if you think about that experience – I think
00:22:41:17 – 00:23:38:07
everybody’s probably experienced that hamstring thing – you’ll know that the thighs are doing the work. So think about using your thighs to push your knees away. Let’s add the count now. I’m going to use the usual 4 4. So inhale 2 3 4. Exhale 2 3 4. Inhale 2 3 4. Exhale 2 3 4. Inhale 2 3 4. Exhale 2 3 4. Inhale 2 3 4. Exhale 2 3 4. There are a few choices that you can make if that’s difficult for you.
00:23:38:07 – 00:24:09:17
You can also walk your feet a little bit farther away from your butt. You might not get as high naturally because the knee is not as high, but it might be easier on your knees. You can also lift your toes to engage the knee ligaments and tendons equally, and that will take care of any knee discomfort. So make a choice about how you’re going to do it, and try a few on your own with your breath pace.
00:24:09:19 – 00:24:14:07
And please notice as you go, because I’m going to ask.
00:24:23:02 – 00:24:51:03
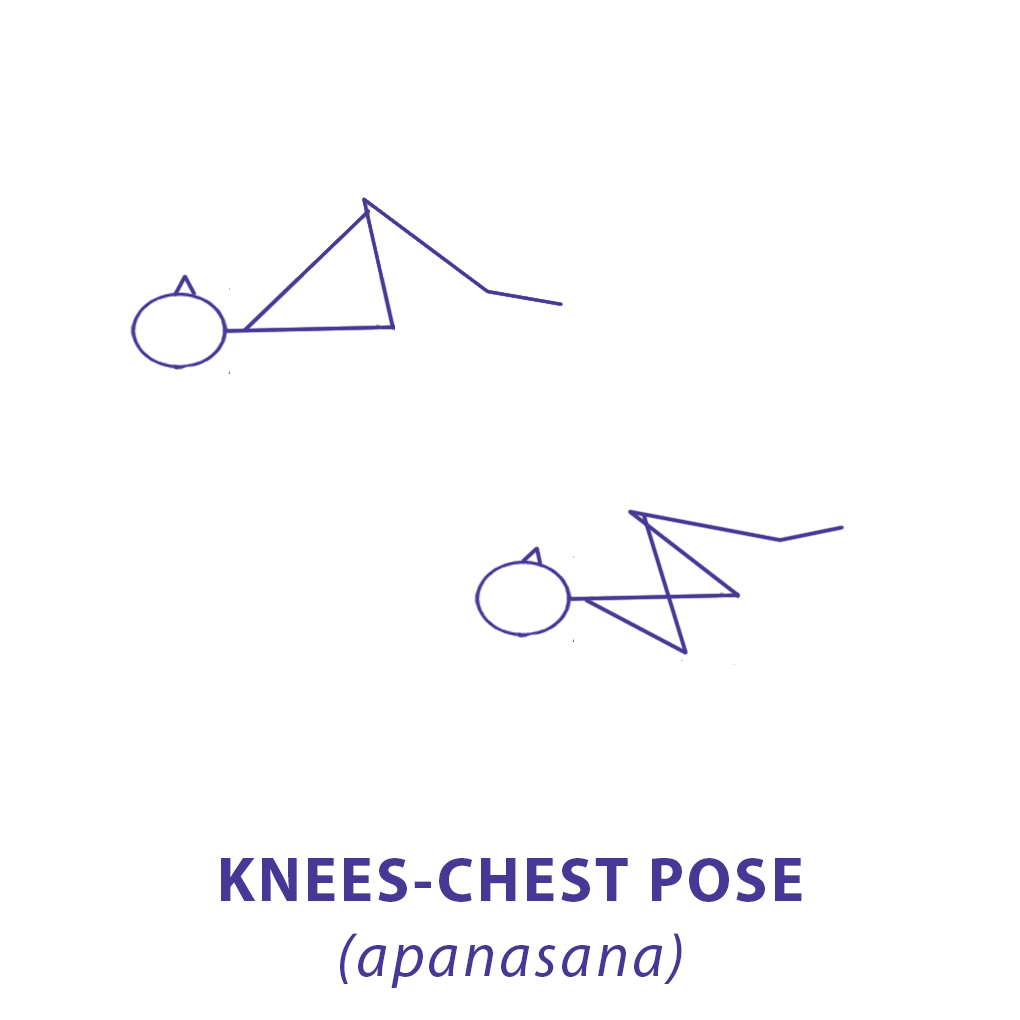
So notice how you feel. Notice in particular any parts of your body that want your attention right now. Doing a toe to head scan. And then we’re going to offer one more counter pose just to finish this off. And this is one that we’ve done before too. So bring one knee over your chest, fingers in the knee crease the other knee over the chest,
00:24:51:03 – 00:25:23:23
fingers in the knee crease. Rock back and forth to get the low back flat. And then remember I gave you three options. Knees together, knees shoulder width apart, and knees wider than your torso. And you’re going to try each of the three. I’m going to talk you through it right now. And then when you pause the video, you’ll use the one that gave you the most bang for your buck in terms of stretching your hips, your low back, maybe even your thighs and legs.
00:25:24:01 – 00:25:57:04
So I’m together, knees are together. Inhale away until the arms are straight. And then let the hips, not the arms, bring your knees towards your chest. And when you’re close, you can give a little hug with the arms. Now position those knees about hip width apart. Inhale away until the arms are straight. And then let your hips bring the knees back to the chest.
00:25:57:06 – 00:26:26:17
You’re coming in wider of course. And then give a little hug. And now we’re going to position the knees wider than the torso. Inhale away. Straight arms. And then exhale in, gently letting the hips do the work, not the arms. And then at the end you can give a little squeeze. So while you were doing those with me, one of them felt better than the others,
00:26:26:17 – 00:26:45:23
gave you a deeper stretch. And that’s the one that I suggest you choose. Do a few of those until you’re just not getting any more joy from that stretch in your low back, in your hips. And then and notice, because I will ask and while you’re doing that, I’m going to move my chair and fold up my mat.
00:26:46:05 – 00:26:50:03
So pause the video, give it a few practices, and I’ll be back in a minute.

00:26:59:23 – 00:27:39:16
So take a moment to notice how you felt from bringing your knees into your chest. You’ve already, I hope, made your way back up to sitting on your chair. If you haven’t, take a moment to do that now. You can use the chair to get up. And so in 13 classes, we’ve talked a lot about not harming your body, about respecting your body, about appreciating and being content with your challenges and limitations right now, but also watching yourself grow, watching yourself change.
00:27:39:18 – 00:28:12:07
You can repeat these videos as often as you like and keep on growing. Your breath ratios might change, your abilities might change. Your endurance will change. All these things are a good idea, so you can take responsibility for your own nervous system regulation. Remember, breath is the biggest tool in your tool bag for nervous system regulation. And so keeping that in mind, let’s close out with the deeper breath awareness practice.
00:28:12:09 – 00:28:46:02
Find your seat. Pull your feet in. Stack your spine. Lift your chin. Arms are limp and relaxed. Take a long, gentle inhale that makes you a little taller. And on exhale close your eyes and soften anywhere you know you hold tension. Bringing your attention to the breath in your nose. And on exhale, soften your cheeks. Smooth out your forehead.
00:28:46:04 – 00:28:56:22
Let your … the little muscles around your eyes be quiet and slow.
00:28:57:00 – 00:29:31:06
Bring your attention to the breath moving through your throat. And on exhale, soften that space between your ears and shoulders. Let your shoulders melt down your neck. Be long and soft. Your chin probably comes up a little bit, and you can really feel those curves in your spine all lined up to do their job most efficiently. Then bring your attention to the breath, moving your chest.
00:29:31:08 – 00:29:43:03
And on exhale, soften the space between shoulders and arms so that arms can be limp and soft.
00:29:43:04 – 00:30:18:23
And then bring your attention to how breath moves belly. And on exhale, soften that space between hips and legs. Feel yourself balanced on your pelvic floor. On your tailbone. Feel your spine stacked up. And then in this optimal position for breathing, come into that little triangle between the bottom of your breastbone and your navel, and either with your hand or with your inner awareness,
00:30:19:01 – 00:30:25:17
watch your diaphragm go down on inhale.
00:30:25:19 – 00:30:36:22
And up on exhale for a few breaths.
00:30:37:00 – 00:31:13:09
And then with your next inhale bring eyes open. So thank you for hanging in for 13 asana classes. I hope you’ve also so far done the first 12 pranayama and meditation classes. You’re going to need to begin to think about your time allotment for yoga, to begin to notice how much time you’re taking, and maybe that will have some impact on whether you do 5 or 3 repetitions when I ask you to pause.
00:31:13:11 – 00:31:35:22
But it is really important. Asana prepares you for pranayama, so right now you are primed to enjoy class 13 of pranayama. And pranayama primes you to be really receptive to meditation. I can’t tell you how many people
00:31:35:22 – 00:31:54:13
have told me that they can’t meditate because their minds too busy, or they can’t sit still. Yoga is taking care of most of those concerns for you so that you’re prepared for meditation, which is the ultimate goal and the most effective tool for nervous system regulation.
00:31:54:15 – 00:32:21:10
Breath facilitates it. Meditation cements it into your nervous system, into use of the parasympathetic system as your default mode. So if you have any questions, please leave comments or messages on social media or the website, or send me an email and I thank you very much for your attention and time. I hope you enjoyed it.
Thank you!
This concludes the Spring series of Yoga for Nervous System Regulation! You’ve done a fantastic job. Thank you for spending your time learning and growing with me. I hope you’ll join us for the Summer series, beginning on June 21.
Comments or questions?
I’d love to hear about your experience with this week’s class and address any concerns you may have. If you’d prefer to reach out privately, send me an email at kath@kmkyoga.org.
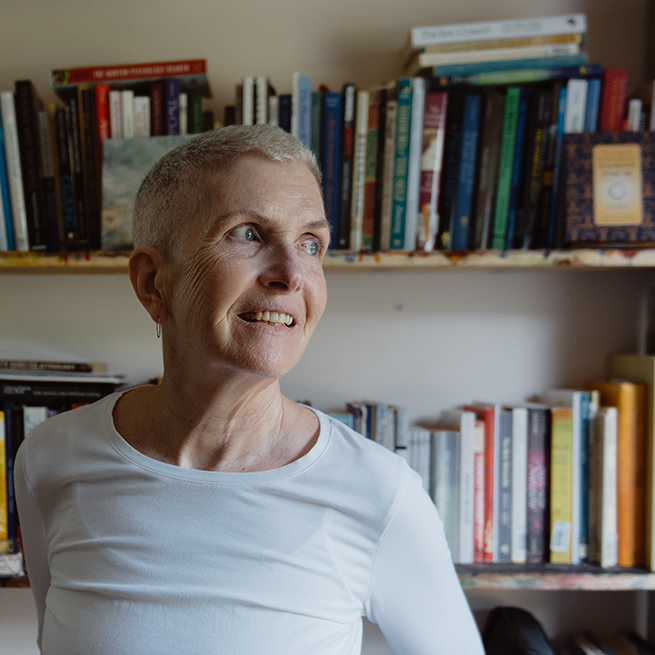
Hi, I’m Kath. I teach yoga, breathwork, and meditation as a path to greater somatic awareness and nervous system regulation. Through this practice, I have learned to care for myself so that I can live more peacefully and more purposefully in my body, my mind, and the world. Read my full bio here.
I created KMKyoga for people like me, who can benefit tremendously from yoga but need an option that doesn’t break their bodies or their budget. All KMKyoga classes and learning resources are funded by donations. Learn more.