Yoga for Nervous System Regulation | Spring Class 12
In This Series
New here? Read this first!
Yoga for Nervous System Regulation is a unique program combining yogic tradition with neuroscience to help students engage with the nervous system, calm stress responses, and cultivate peace and resilience in body and mind. Learn more about the program here.
Here’s what you need to know to get the most out of this practice.
- Please complete the entire Spring Series in order before moving on to subsequent series, regardless of the current season. Each series builds upon the material covered in previous seasons, so doing them in sequence is important for your understanding and your safety.
- Yoga is best practiced on an empty stomach, which means no food for 2 hours prior and no beverages for 30 minutes prior. Follow your practice with food and plenty of water. Review the complete Yoga Safety Tips here.
- Each weekly class consists of a playlist of 3 practices to be completed in order. The asana (yoga poses) prepare us for pranayama (breathwork) which prepares us for meditation, which prepares us for life!
- This course is designed to accommodate a range of learning styles. Below the video playlist you’ll find additional visual aids and links to resources that enhance the learning experience.
- Yoga is a very individualized experience, and it’s normal to have questions or concerns. I would love to hear yours! Please submit a comment at the bottom of the page, or follow KMKyoga on Instagram, where I share additional insights, support, and resources with a growing community of fellow practitioners.
Thanks for being here!
The niyama for this week’s asana class is ishvara pranidhana. It’s often translated as “devotion to god,” but ish means “power” and vara means “best.” Prana is life force, and dhana means devotion. So for our purposes, ishvara pranidhana means devoting your highest power – your agency – to developing your self and your life. In pranayama, we’ll continue working on slowing the breath, and talk a bit about the ideal ratios of asana, pranayama, and meditation for your practice. We’ll end with a meditation on applying isvara pranidhana to develop somatic awareness and identify the self-care that we need in that moment in order to just authentically be.
Remember, yoga is best practiced on an empty stomach. Review the complete Yoga Safety Tips here.
Please don’t hesitate to ask questions in the comments section at the bottom of the page, or by sending me an email at kath@kmkyoga.org. I’m happy to help with clarifications or modifications to ensure your practice is safe, comfortable, and enjoyable.
Find a quiet space with room to move. You may wish to pause notifications on your digital device. Gather your mat, a sturdy chair, some water, and a blanket. When you’re ready, hit Play on the first video in the playlist – asana – to begin.
Enjoy your practice!
In This Series
This course is provided on a pay-what-you-can basis. If you value what you find here and want to contribute, make a donation. If you’re not able to donate today, please join us for free.

Get course updates, news, and insights about yoga, meditation, neuroscience, and more in your inbox.
Spring Class 12 Video Instruction
Each class playlist consists of three videos to be practiced in order:
Asana ➙ Pranayama ➙ Meditation
The purpose of asana (yoga pose or “seat”) and pranayama (breathwork) are to prepare the body and mind for meditation, where the real magic happens! I strongly suggest you try the classes in sequence, but after you’ve completed the entire sequence at least once, feel free to revisit individual parts as you’d like.
Once you complete a video, the player will automatically advance to the next one in the playlist. You can skip to the next video at any time using the next/previous arrows at the bottom of the player window, or by clicking the icon in the top right corner.
Asana (Pose) Descriptions
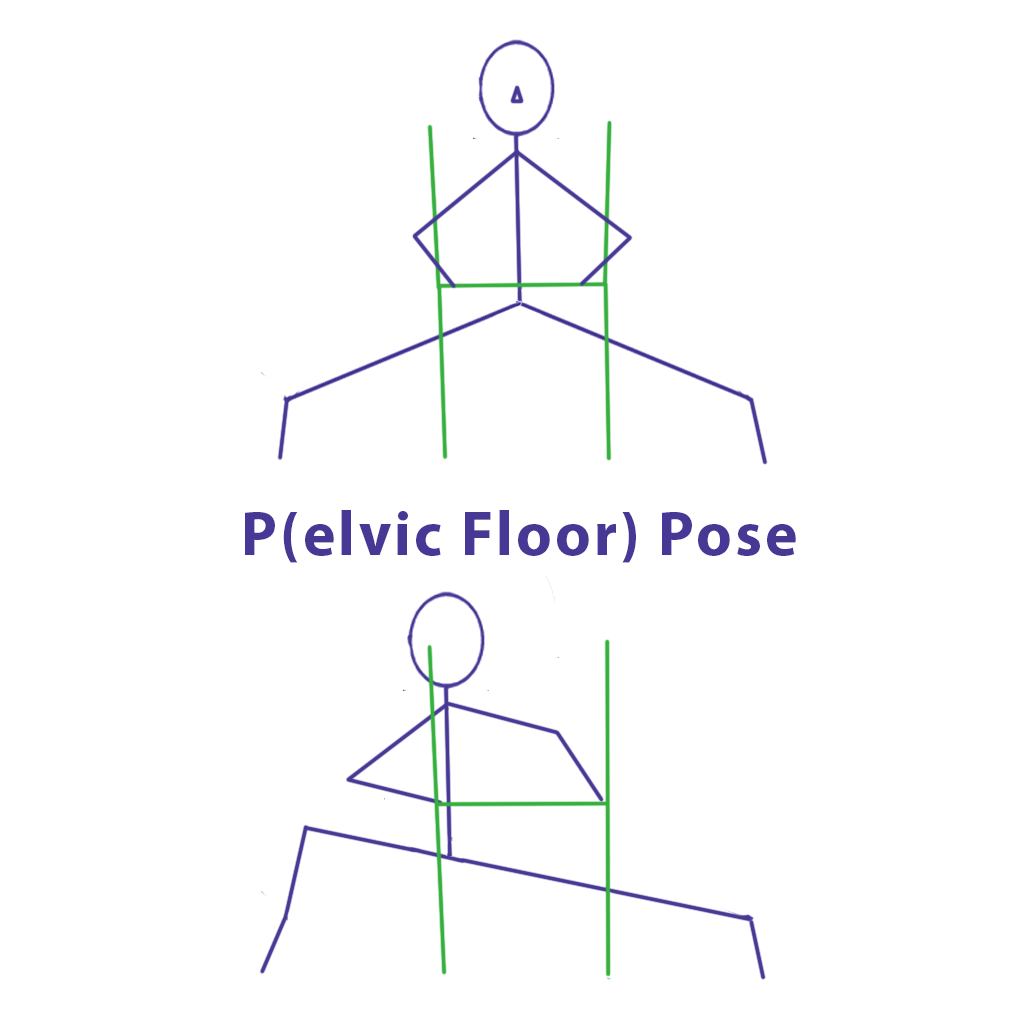
The following diagrams are offered as a supplement to today’s asana practice. Use them to quickly reference specific poses in the video, review verbal instructions in written form, and clarify details from the class. Scroll within each text box for transcript excerpts with time stamps indicating when each pose is demonstrated in the Asana Video for today’s class.
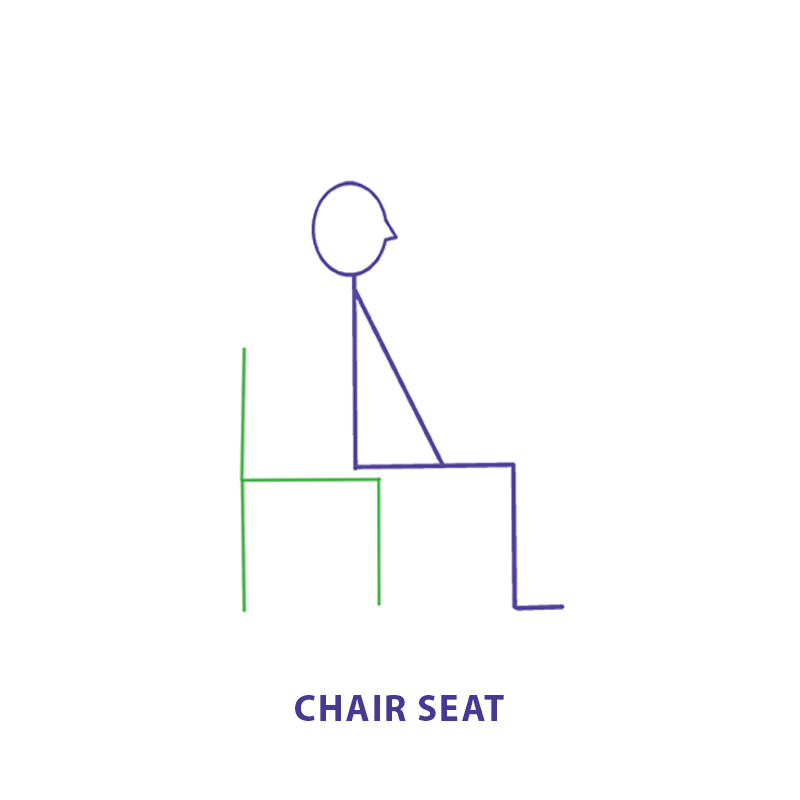
00:03:56:01 – 00:04:35:08
So let’s get ready to practice. Find your seat. Same old seat: sits-bones, knees and feet hip width apart, knees over heels. Pull your feet a little toward you to get the angle of your pelvis right. Stack your spine up on your tailbone. Your chin will lift a little and then let your arms rest. If the palms are down, the shoulder turns in slightly and is more neutral, but whatever’s most comfortable for your shoulders is a fine way to position your hands and arms.
00:04:35:10 – 00:05:02:10
Take a long, gentle inhale that makes you taller, and on exhale, close eyes, soften anywhere you know you find tension. For a lot of us, that’s in the shoulders. We hunch up our shoulders towards our ears. But whatever works for you is fine. Bring your attention to the breath in your nose.
00:05:02:12 – 00:05:08:16
Throat.
00:05:08:18 – 00:05:14:20
Chest.
00:05:14:22 – 00:05:20:04
Belly.
00:05:20:06 – 00:05:38:05
And then the little triangle between the bottom of your breastbone and your navel. Watch your diaphragm move down on inhale. And up on exhale.
00:05:38:07 – 00:05:46:00
And then a breath that fills the whole torso.
00:05:46:02 – 00:05:51:07
And then whenever you’re ready, inhale. Eyes open.
00:05:51:07 – 00:06:13:10
So let’s check out the same way we do each time. Check out our upper body, check out our low back and see if we’re ready for yoga. Let your arms hang down. Of course you’re in your proper seat. Let your arms hang down. Exhale here and inhale up.
00:06:13:12 – 00:06:18:00
Exhale down.
00:06:18:02 – 00:06:27:15
Inhale up. Exhale down. Pause the video and do a few of your own.
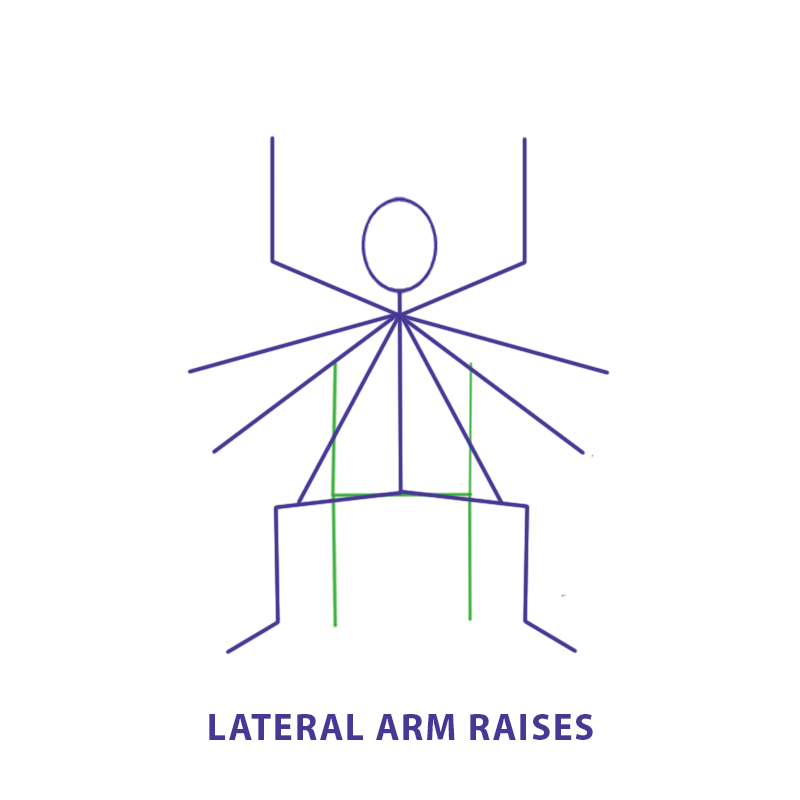
00:06:39:01 – 00:07:02:17
Notice your upper body. Notice the effects of the movement in the breath. Have on your neck your shoulders your upper back and chest. And if that’s feeling pretty good, let’s move on to checking out our low back and give it a bit of a stretch. Remember I mentioned last week this is the one that gets me out of bed when I wake up a little bit stiff.
00:07:02:19 – 00:07:30:17
you can use it that way yourself. Just go very gently. So knees and feet are much wider, and your thighs and knees are pointing right at your feet, right at the space between toe two and three. Same on this side. The thigh and the near pointing right at that space between the second and third toe. Inhale up tall and then hinging only at the hips.
00:07:30:17 – 00:07:45:20
Exhale down. When you can’t be straight any longer, begin to curve from the tailbone up to the top of the head. Maybe the top of your head is pointed at the floor.
00:07:45:22 – 00:08:08:06
Bring your attention to your low belly as you inhale. And on exhale, soften the belly and feel the low back lengthen from tailbone to waist. Then bring your attention to the breath in your upper belly. Inhale.
00:08:08:08 – 00:08:38:20
And on exhale soften the upper belly and feel that lengthening of the spine extend up toward the ribs. Then inhale into chest shoulders upper back. And on exhale let the breath leaving your body soften the body so you’re hanging from your tailbone all the way to the top of your head. We take our extra breath because our heads lower than our heart.
00:08:39:02 – 00:09:12:05
But it’s also one more nice long stretch for the back. So inhale all the way down to the tailbone. That will lift you up a little bit. And then exhale soften. Low belly upper belly chest neck. Let your head hang freely and then straighten. Push down with the feet and inhale your way up. Take a moment at this point to check out the breath you brought today to your practice.
00:09:12:07 – 00:09:30:03
Use 2 or 3 breath cycles to determine your ratio for today. Maybe it’s 334455. Whatever’s best for you. Check that out now while I transition to moving my chair and setting up my mat, please.
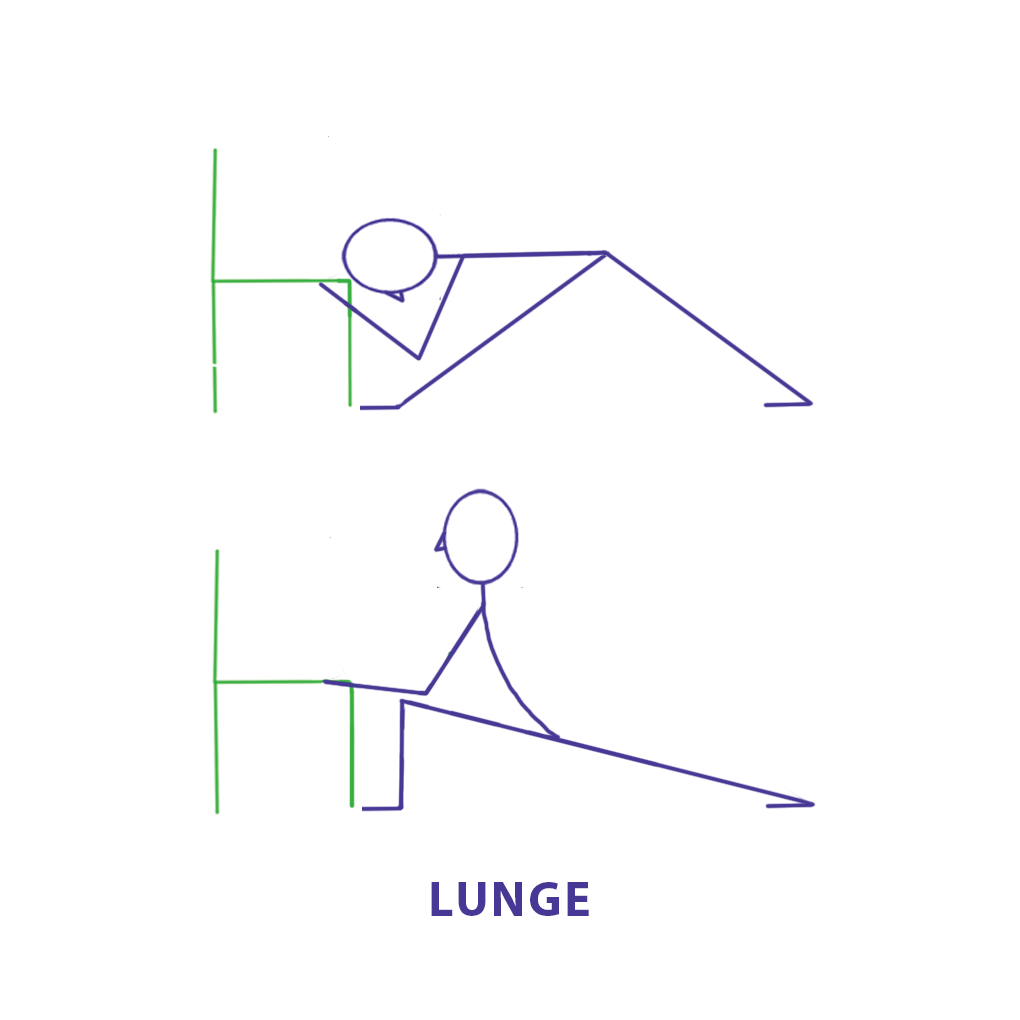
00:09:30:18 – 00:09:56:22
The same safety parameters are always going to apply. I want the front legs of your chair anchoring down your mat for safety. Your chair needs to be heavy and sturdy so it’s not easily tipped over and you want it up against something. It doesn’t have to be high. It could be the sofa seat or a wall so that the chair doesn’t slide when you’re practicing.
00:09:57:00 – 00:10:07:13
So we’re going to warm up using the half sun salutation and a little bit of,
00:10:07:15 – 00:10:36:00
A little bit of extra movement to prepare us for what we’re going to do next. So. Remember your ratio I’m going to use A44. You can if four four is your number go ahead and practice with me. But if it’s not or if you’re unsure about the pose just watch. And then of course there’ll be an opportunity to pause and try it on your own at your breath ratio.
00:10:36:02 – 00:11:31:14
Exhale here. Inhale 234. Exhale 234. Soften down. And then inhale step one foot back 234. Just feel that for a moment. That feels good. Then lay on your front thigh. Straighten the front leg as much as you can and exhale 234. Inhale 234. Exhale 234. Hold on. Soften. Then with the other foot inhale 234. Just enjoy that for a blink.
00:11:31:16 – 00:11:55:18
Lay on the front of your thigh and straighten it. And exhale 234. Hang. Inhale up so you have an idea you can do it. Pause the video and do a few more on your own and then come back. Remember to notice while you’re doing it because, you know, I’m going to ask.
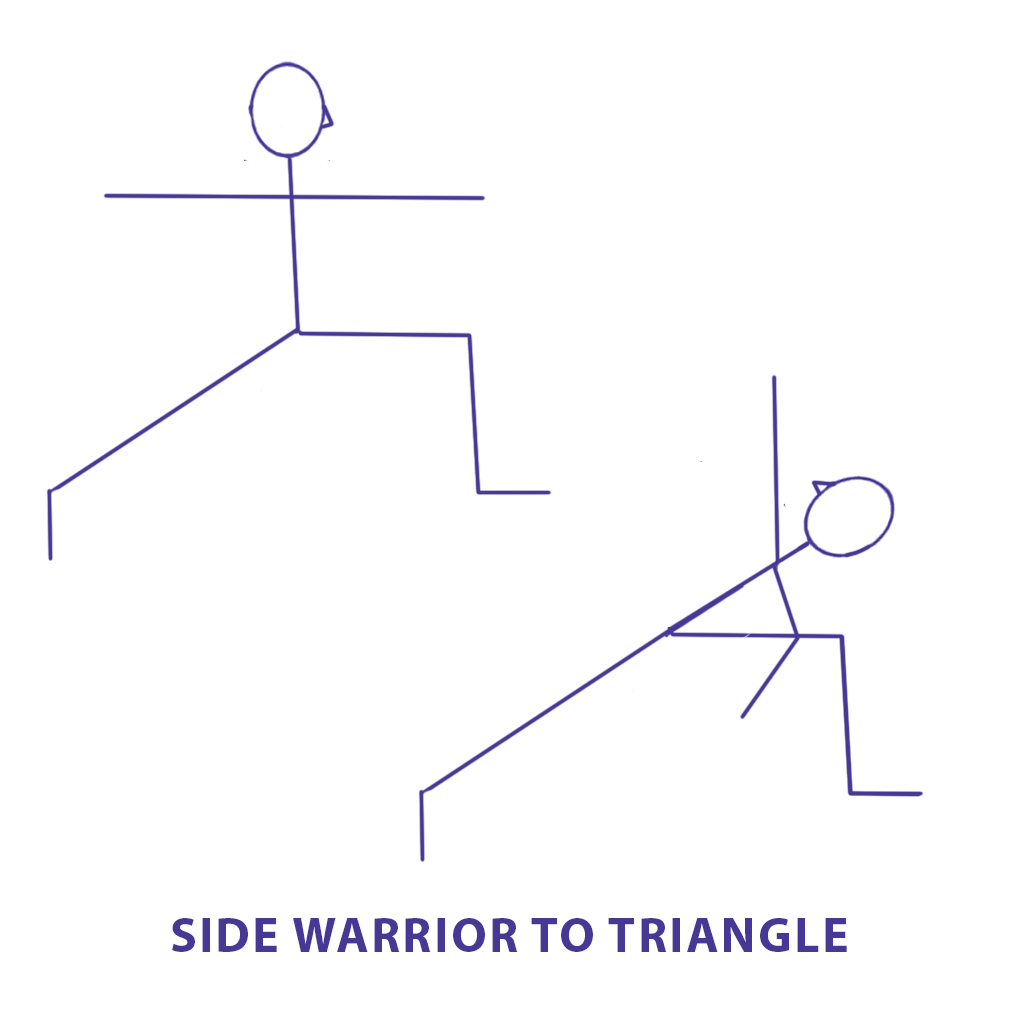
00:12:04:11 – 00:12:16:17
So for this next pose we’re going to go wide. Feet are still going to stay parallel. So.
00:12:16:19 – 00:12:52:11
And you want your feet as wide as you can manage and still be upright. You’ll notice if you go too wide that your hip starts to fold. That’s not about flexibility. That’s about the actual structure of the socket that holds the top of your hip, the top of your thigh. And it’s limited. Everybody’s is a little different. How much motion you get in and out of that, that socket for the ball and socket joint is what determines how wide you can go.
00:12:52:13 – 00:13:22:08
So find your pose, find your position. And then let’s start with this foot. I’m going to pick the toes up and spin them out and put them down. This foot is now parallel with the long side of the mat. My hips are at an angle. That’s as it should be. You will see some teachers tell you to straighten your hip so that it’s parallel to the long side.
00:13:22:10 – 00:13:49:10
That’s not the way hips work, and there’s a lot of challenge to the iliosacral joint when you do that. So you are at an angle with your hips, but your shoulders can turn. So I’m in a twist from the very beginning in this pose. From this position, this arm should probably hang behind your thigh. That’s a good I good way to measure that.
00:13:49:10 – 00:14:18:20
You’ve come parallel to the long side. While you’re in this position, I like you to practice bending this knee to over top of your heel, no further. And when you get there, soften your low belly. It’s hard to believe, but that actually makes it a little easier and then straighten it back up. So let’s do the simple version of this first with our breath ratio.
00:14:18:22 – 00:14:43:04
I’ll use 4/4 again, so if you’re a 4 or 4 you can do along with me. Otherwise watch and then I’ll give you a chance to pause and practice. So I’ve squared off my shoulders. This arm is hanging behind my thigh. Exhale here; as you inhale the arms up, look at the front hand. So I’m going to start again so you can hear the count.
00:14:43:06 – 00:15:31:10
Exhale here. Inhale 2 3 4. Bend 2 3 4. Soften that low belly. Straighten the leg 1 2. Inhale 3 4. Lower the arms on exhale 2 3 4. Inhale 2 3 4. Bend the knee, exhale 234. Soften the belly. Inhale as the knee straightens 2 3 4. Lower the arms 2 3 4. Pause your video. Try a few of those at your breath pace and notice how you feel while you’re doing it.
00:15:40:11 – 00:16:12:09
Okay, please notice. Pay particular attention to if your knee is happy. If your hips are comfortable, if your shoulders are adequately taking the weight of your arms; notice all those things. That’s the parts of your body that are working the hardest. Now. So we’re going to kick this up just a little bit. This is kind of fun. It’s a variation on what traditional American Exercise Yoga calls trikonasana, but it’s really a variation.
00:16:12:11 – 00:16:38:06
Let me just show it to you without counting, without the special breath, so that you get it. I inhale up, I bend the knee, and then there’s several ways I can do this. I can put my hand on my knee, or I can put the back side of my arm on my knee. I’m going to use the arm, bend my arm and this arm comes down to the thigh.
00:16:38:08 – 00:17:12:16
This arm comes behind my ear and then pulls that shoulder away from the hip. This feels really good. Do it gently, though. To come out of it, we begin by bringing the top arm down. Then the front arm comes up, back arm drops and you pull that shoulder away from the hip. Come back down to parallel arms, straighten and lower.
00:17:12:18 – 00:17:33:02
If that feels like Ricky teaching Lucy how to play golf, I understand, but that is not my objective. I do want you to do yoga; he never wanted her to play golf, so he made it too complicated. That’s not what I’m doing. You can do this. You really can. So let’s talk it through. You might want to practice with me this time.
00:17:33:02 – 00:17:56:16
I’m not going to talk about breath yet just to make sure you’ve got it. So inhale the arms up. Keep those shoulders soft. We’re going to slowly bend the knee until the knee is over the heel. Soften your belly. Bend this arm and turn your palm up. Remember this arm is coming behind my ear. And over I go.
00:17:56:16 – 00:18:30:02
And then pull this arm to take the shoulder away from the hip. We come back down, aiming this hand for behind the thighs. Front arm comes up and pulls away the shoulder from the hip. Come back to parallel, straighten and lower. Try that a few times and then we’ll put the breath in. I want you to notice how you feel.
00:18:38:18 – 00:19:07:10
So notice how you felt. Notice how that went for you. You might want to go back to the simpler version and that’s okay. The pace at which you advance should be respectful of your body, respectful of your strengths and flexibilities. But if you’re able, let’s give this a try with some breath stays. I’m not going to count the beginning breaths so much, but you know what to do.
00:19:07:11 – 00:20:08:09
I’ll give you a hint. So inhale 2 3 4. Exhale 2 3 4. Drop and inhale 2 3 4. Stay. Exhale 2 3 4. Inhale 2 3 4. Exhale 2 3 4. Inhale and stay. Exhale 2 3 4. Inhale 2 3 4. Exhale 2 3 4. Inhale 2 3 4. Exhale 2 3 4. I said I wasn’t going to count the whole breath but I did. You can do it that way. Or you can do it without any count at all.
00:20:08:14 – 00:20:27:20
But give it a try and let me know how that goes. Meanwhile, I’m going to turn my foot back in. So pause the video and notice how you feel after you do a few on your own.
00:20:27:22 – 00:20:52:13
Notice how you feel. We definitely want to do the other side because we always want to balance out our asymmetry. Remember though, first time on the second side might be different. So we want to leave room and space to gently explore that. I’m going to pick up these toes. Out they go. We’re doing – the hips are at an angle.
00:20:52:14 – 00:21:13:00
The shoulders are turned to the long side of the mat. Practice your knee bend. Know where it’s going. Soften your belly when you get there. And then up again. We’re doing the simple version first. I’ll count the breath in for this.
00:21:13:02 – 00:21:56:16
Inhale 2 3 4. Exhale 2 3 4. Soften the belly. Inhale 2 3 4. Exhale 2 3 4. Inhale 2 3 4. I’m now looking at my front hand. Exhale 2 3 4. Soften belly. Inhale 2 3 4. Exhale 2 3 4. Pause. Use your breath ratio and do a few of those. And notice.
00:22:07:13 – 00:22:41:03
So notice how you feel. We’re going to move on to the slightly more complicated one. And I want you to remember to go very gently on this second side with this, also. So square off those shoulders so that this arm hangs behind the thigh. It’s a good measure for when you’re in the right spot. So inhale 2 3 4. Exhale 2 3 4.
00:22:41:05 – 00:23:13:03
Turn this arm so that the palm is up. And I’m bringing the other arm behind my ear and stretching it out to pull my shoulder away from my hip. This arm comes back down to behind the thigh. And this arm comes up. And I pull this shoulder away from the hip. Down we come to horizontal, straighten and lower.
00:23:13:05 – 00:23:24:16
Pause and try that a few times. If you need to see it again, backtrack, rewind and watch it again, but make sure you feel safe. Play it along if you want. Use your breath.
00:23:33:17 – 00:23:49:05
Okay. Notice how you feel. Notice. Notice and then remember to swing that foot back in. I want you to bend your knee and foot comes in so your feet are parallel now.
00:23:49:07 – 00:24:15:23
And we’re going to use again the pose that I’ve heard called Durga pose. Durga was a Hindu goddess with a lot of arms. So when you have things that have lots of arm positions, people think of Durga. And the breath we’re using is lion’s breath. That’s pretty self-explanatory. Turn one heel in so you are pointing your toes the same direction as your knee.
00:24:16:01 – 00:24:48:03
Straighten it. Turn the other one out or turn the heel in. Find your balance. Try not to grip with your toes and practice the motion which is bending the knees to come down until you’re parallel with the floor. If you don’t get down that far, that’s okay. So the breath we’re going to use is one of the few, as I mentioned when we learned it before, to exhale breaths that go out the mouth and you stick your tongue out too.
00:24:48:05 – 00:24:59:02
So it looks like this. Exhale here. Inhale up. Exhale.
00:24:59:04 – 00:25:06:19
Inhale bigger because we want the sound to be louder.
00:25:06:21 – 00:25:16:02
Inhale up again. Biggest breath yet.
00:25:16:04 – 00:25:34:22
Inhale up. Arms come down. Bend the knee to turn. One set of toes in, the other set of toes in. Shift your weight to one side and jump yourself together. I’m going to place my chair and we’ll close out with our breath practice.

00:25:35:08 – 00:25:39:21
Same seat. Almost always the same seat.
00:25:40:17 – 00:26:12:13
It occurs to me that I didn’t mention why I’m wearing jeans instead of what people think of as yoga clothes. Confession: they are stretchy jeans. But I have some pretty strong feelings that if you can’t do yoga in your clothes, maybe your clothes aren’t that comfortable for your body. Think about that. If you have, the opportunity to wear something that’s a little more comfortable, I think your whole body will be grateful.
00:26:12:15 – 00:26:37:04
So find your seat again. Knees and feet hip width apart, knees over top of heels. And then pull those feet in to align the pelvis and straighten up. Stack the spine up on top of the tailbone. Let your arms rest whatever’s most comfortable in a way that’s most comfortable for you.
00:26:37:06 – 00:26:52:10
Take a long, gentle inhale that makes you a little taller in your seat. And on exhale, close your eyes and soften. Anywhere you hold tension.
00:26:52:12 – 00:26:57:21
Bring your attention to the breath in your nose.
00:26:57:23 – 00:27:21:04
And on exhale, soften your cheeks. Let your forehead be smooth, your gaze behind the closed eyelids vacant, soft so that the muscles around your eyes can slow down, quiet down.
00:27:21:06 – 00:27:45:21
Bring your attention to the breath moving through your throat. And on exhale, soften the space between ears and shoulders. Let your shoulder blades melt down your back, your neck become long and supple. Your chin will probably lift a little bit, and that’s okay.
00:27:45:23 – 00:27:51:22
Bring your attention to the breath that moves your chest.
00:27:52:00 – 00:28:06:04
And on exhale, soften that connection between shoulders and arms so that the arms can be more limp.
00:28:06:06 – 00:28:26:04
Bring your attention to the breath that moves your belly. And on exhale, soften that hip-leg connection. Feel that sense of being balanced on your tailbone. Your whole spine.
00:28:26:06 – 00:28:50:13
And then find that little triangle between the bottom of your breastbone and your navel, and with your hand or with your interoception, your inner awareness. Watch your body breathe as the diaphragm goes down on inhale and up on exhale.
00:28:50:15 – 00:29:23:23
Take a long breath. It fills your whole torso. And bring eyes open. So I hope you will go on to do series 12, class 12 for pranayama and meditation. If you have any questions about what we did, please send me a message or make a comment under the social media posts or on the website. Thank you and I look forward to seeing you next time.
Additional Spring Class 12 Resources
In today’s pranayama, we practice nadi shodhana, a single nostril breathing technique that uses the hands to block alternate nostrils. Review this video for a refresher on how to do that.
Comments or questions?
I’d love to hear about your experience with this week’s class and address any concerns you may have. If you’d prefer to reach out privately, send me an email at kath@kmkyoga.org.
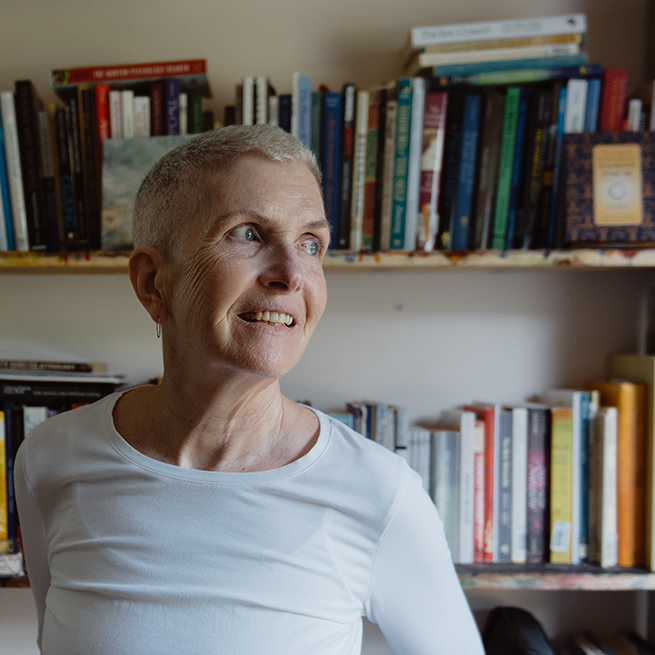
Hi, I’m Kath. I teach yoga, breathwork, and meditation as a path to greater somatic awareness and nervous system regulation. Through this practice, I have learned to care for myself so that I can live more peacefully and more purposefully in my body, my mind, and the world. Read my full bio here.
I created KMKyoga for people like me, who can benefit tremendously from yoga but need an option that doesn’t break their bodies or their budget. All KMKyoga classes and learning resources are funded by donations. Learn more.