Yoga for Nervous System Regulation | Spring Class 4
In This Series
New here? Read this first!
Yoga for Nervous System Regulation is a unique program combining yogic tradition with neuroscience to help students engage with the nervous system, calm stress responses, and cultivate peace and resilience in body and mind. Learn more about the program here.
Here’s what you need to know to get the most out of this practice.
- Please complete the entire Spring Series in order before moving on to subsequent series, regardless of the current season. Each series builds upon the material covered in previous seasons, so doing them in sequence is important for your understanding and your safety.
- Yoga is best practiced on an empty stomach, which means no food for 2 hours prior and no beverages for 30 minutes prior. Follow your practice with food and plenty of water. Review the complete Yoga Safety Tips here.
- Each weekly class consists of a playlist of 3 practices to be completed in order. The asana (yoga poses) prepare us for pranayama (breathwork) which prepares us for meditation, which prepares us for life!
- This course is designed to accommodate a range of learning styles. Below the video playlist you’ll find additional visual aids and links to resources that enhance the learning experience.
- Yoga is a very individualized experience, and it’s normal to have questions or concerns. I would love to hear yours! Please submit a comment at the bottom of the page, or follow KMKyoga on Instagram, where I share additional insights, support, and resources with a growing community of fellow practitioners.
Thanks for being here!
This week, we’ll try some wide-legged asanas including my favorite stress-buster, and soothe our nerves with brahmari, or Bee Breath. We’ll end with an “Awe Walk” visualization during the meditation portion.
Remember, yoga is best practiced on an empty stomach. Review the complete Yoga Safety Tips here.
Please don’t hesitate to ask questions in the comments section at the bottom of the page, or by sending me an email at kath@kmkyoga.org. I’m happy to help with clarifications or modifications to ensure your practice is safe, comfortable, and enjoyable.
Find a quiet space with room to move. You may wish to pause notifications on your digital device. Gather your mat, a sturdy chair, some water, and a blanket. When you’re ready, hit Play on the first video in the playlist – asana – to begin.
Enjoy your practice!
In This Series
This course is provided on a pay-what-you-can basis. If you value what you find here and want to contribute, make a donation. If you’re not able to donate today, please join us for free.

Get course updates, news, and insights about yoga, meditation, neuroscience, and more in your inbox.
Spring Class 4 Video Instruction
Each class playlist consists of three videos to be practiced in order:
Asana ➙ Pranayama ➙ Meditation
The purpose of asana (yoga pose or “seat”) and pranayama (breathwork) are to prepare the body and mind for meditation, where the real magic happens! I strongly suggest you try the classes in sequence, but after you’ve completed the entire sequence at least once, feel free to revisit individual parts as you’d like.
Once you complete a video, the player will automatically advance to the next one in the playlist. You can skip to the next video at any time using the next/previous arrows at the bottom of the player window, or by clicking the icon in the top right corner.
Asana (Pose) Descriptions
The following diagrams are offered as a supplement to today’s asana practice. Use them to quickly reference specific poses in the video, review verbal instructions in written form, and clarify details from the class. Scroll within each text box for transcript excerpts with time stamps indicating when each pose is demonstrated in the Asana video for today’s class.
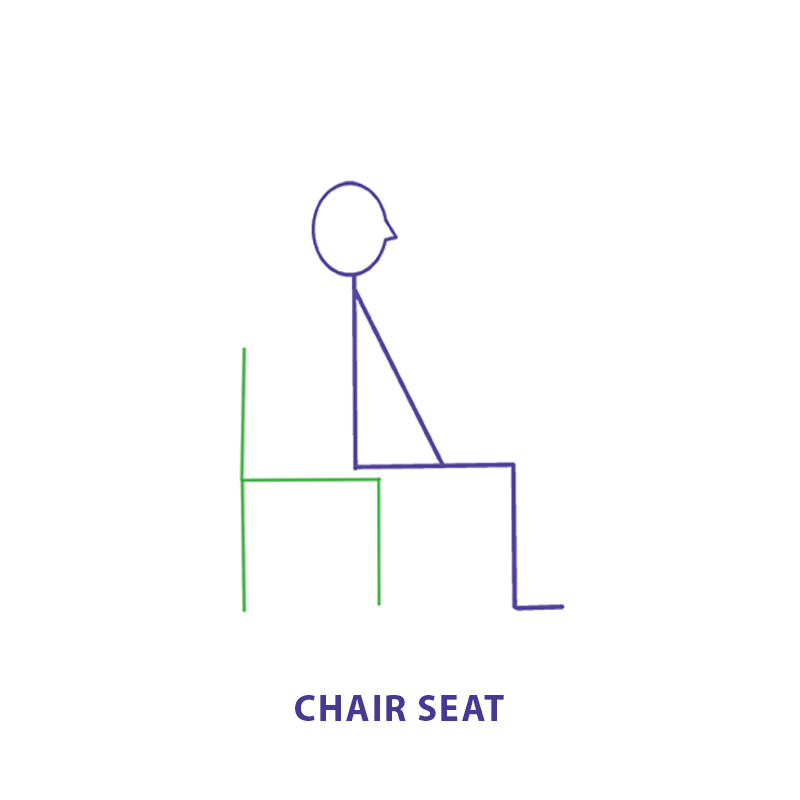
00:02:01:16 – 00:02:25:22
So let’s begin. Find yourself on the front of your sturdy chair that has a back. And it needs to be heavy enough that when you lean forward, the chair doesn’t go with you. Your sits-bones are on the chair. Your thighs are, for the most part, free. Your knees and feet are hip width apart and your knees are over your heels.
00:02:26:00 – 00:02:59:08
From there you have a sturdy seat. And if you just, without moving the feet, just pull your feet toward the chair, you can feel your pelvis engage, which will help you stack up your spine so that it’s supporting your body in the most efficient way. And then relax those feet back to where they were to begin with. So take a long, gentle inhale that makes you a little taller.
00:02:59:10 – 00:03:54:05
And on exhale, just soften anywhere, you know, you find and hold tension. Bring your attention to the breath in your nose, throat. Just feel it. Chest. Belly. And then that little triangle of space between the bottom of your breastbone and your navel. In that little spot, you can feel your diaphragm going up and down, if you like. You can put the center of your palm over that area to feel it.
00:03:54:07 – 00:04:17:17
Feel your diaphragm working. It goes down on inhale and up on exhale and then feel your whole body breathe.
00:04:17:19 – 00:04:43:23
And with your next inhale, bring eyes open. Take a moment. Notice how you feel. Chances are your breath slowed down a little bit while you were becoming more and more aware of it. And let’s carry that on into what we’re doing next. We’re going to make sure our shoulders are up for yoga today. And the way we do that is to let the arms naturally hang from the shoulders.
00:04:44:02 – 00:05:15:00
We’re not stooping forward. We’re not flaring back into a kind of military posture. We’re halfway in between and – out of the corners of your eye – see if you can manage to lift your arms without being able to see them. We exhale here and inhale, keeping the shoulders and neck soft. It doesn’t matter if you bend your elbows. And then exhale takes you down.
00:05:15:02 – 00:05:37:19
Whenever we move away from the body, we almost always use an inhale. And moving towards the body is an exhale. So I’d like you to try a few of those arm raises at your breath pace. Remember, respect the body that you arrive with and use your breath for these sequences.
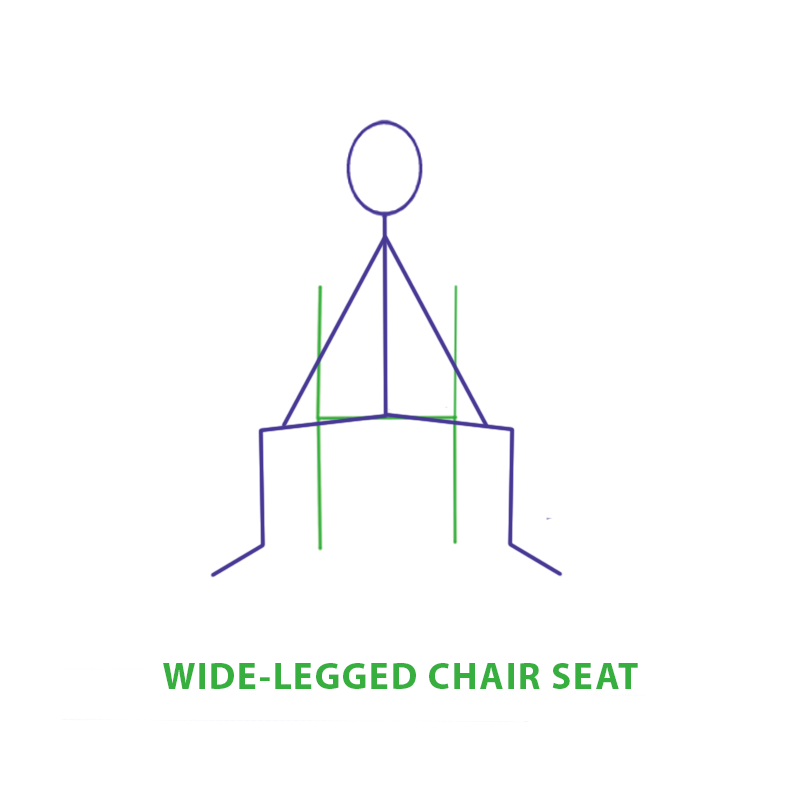
00:06:15:23 – 00:06:44:15
We’re going to go wide. I know it might seem unusual for someone to teach yoga wearing jeans, but my idea is that if you can’t do yoga in your clothes, maybe your body is not very happy in your clothes. So these are stretchy. I get away with it that way. So we’re wider than hip width apart, hands… in fact, palms on your knees if you can.
00:06:44:16 – 00:07:19:21
Long spine. Lift your head. I’m going to inhale here. And hinging only at the hips, my elbows will bend, but I’m hinging at the hips. I exhale forward as far as I can. And when I need to, I begin to curve down. Let your head hang. Inhale into your low belly and let that exhale soften your low, low back.
00:07:19:23 – 00:07:56:21
Direct your attention to the upper belly as you inhale and … as you exhale, feel the mid back release and soften. Breathe into your shoulders and upper chest. And, on exhale let the thoracic spine, let the neck, let the head hang freely. The sense is that your whole torso is hanging from your tailbone. Let’s do one long inhale and exhale.
00:07:56:21 – 00:08:25:12
Release, and then inhale your way back up again. So if your back is happy enough – for most of us, that actually makes our back a little happier – if your back is happy enough, we’ll do a little bit of a seated forward bend just to make sure, and then we’ll move on.
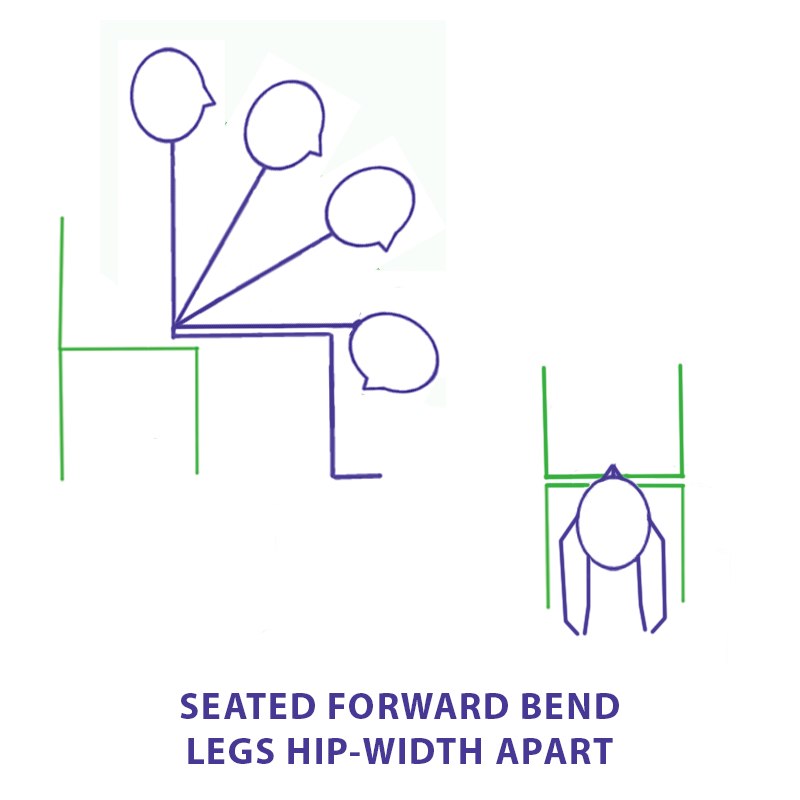
So knees and feet are hip width apart, hands are somewhere on your thighs.
00:08:25:14 – 00:09:05:01
Inhale here and exhale, lying on your thighs, and down you come. Let the arms hang. Take a long inhale here and do an exhale. Soften. Bring your hands back to your knees. And up you come. Each of these is sort of like climbing a set of stairs. You need for each of these pieces to feel safe and pain free for you to move on to the next thing.
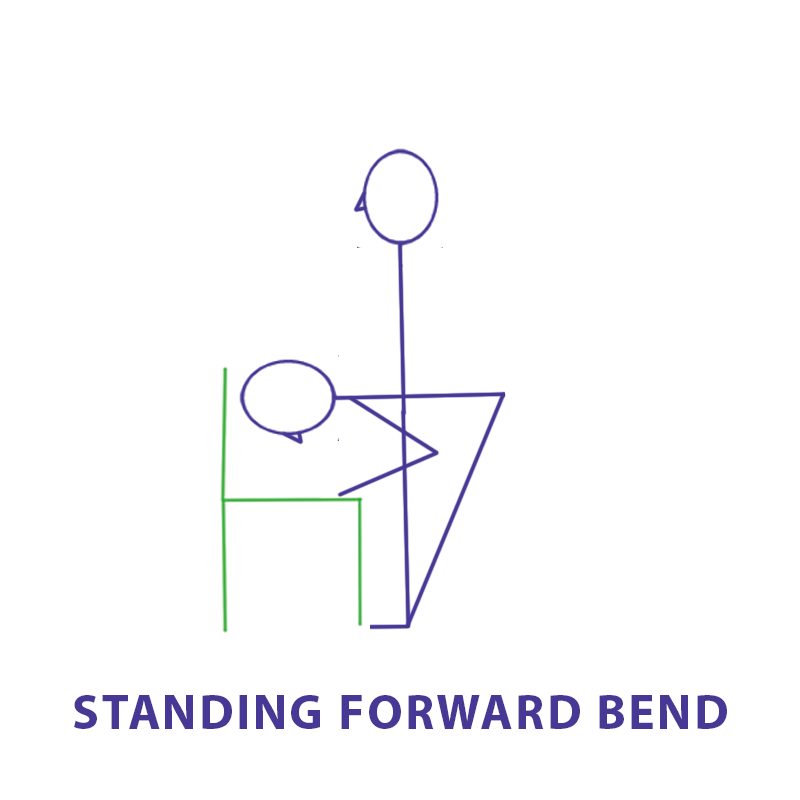
I’m going to switch to a standing pose, which means changing my chair around for your benefit.
00:09:29:18 – 00:10:02:18
You don’t need to change your chair, but you do need to be able to see the video while you’re practicing. And then laying down my mat. The mat needs to be anchored by the chair. They’re not meant to slide, but they will, depending upon the surface you put it, you place it upon. So I’m turning sideways and I’m still focused on being hip width apart with knees and feet.
00:10:02:20 – 00:10:27:07
I’m very close. We talked about this when we talked about Forward Bend the first time. I’m very close and I’m very tall. My head’s not going to hit, not because I’m a yoga person, but because I’m going to balance my forward bend by sticking my butt out. So we’re going to inhale here and on exhale, stick the bottom out.
00:10:27:12 – 00:11:02:08
Gently. Slowly. You ran out of air? Stop. Inhale again and keep going. Sticking the bottom out. Hold on to your chair and down you come. Maybe your head touches. Maybe it doesn’t. Doesn’t matter. And then inhale back up and the hips come forward. You can try a couple of those. Notice how you feel.
00:11:02:10 – 00:11:35:11
So if that was comfortable, you can add the arms. We’ll exhale here. Inhale the arms up. You can look up at them if your neck is happy. And then as you come down, stick the bottom out. Hold on to your chair and soften down. Inhale up. I’m going to do one more just to make sure and then leave you to do a few at your breath pace.
00:11:35:13 – 00:12:00:00
Exhale down, sticking the bottom out. Hold on. And each forward bend completely release at the bottom. Release all your air. Soften the low belly, mid-belly, chest … like you learned to do when we were doing the back test.
00:12:11:21 – 00:12:43:13
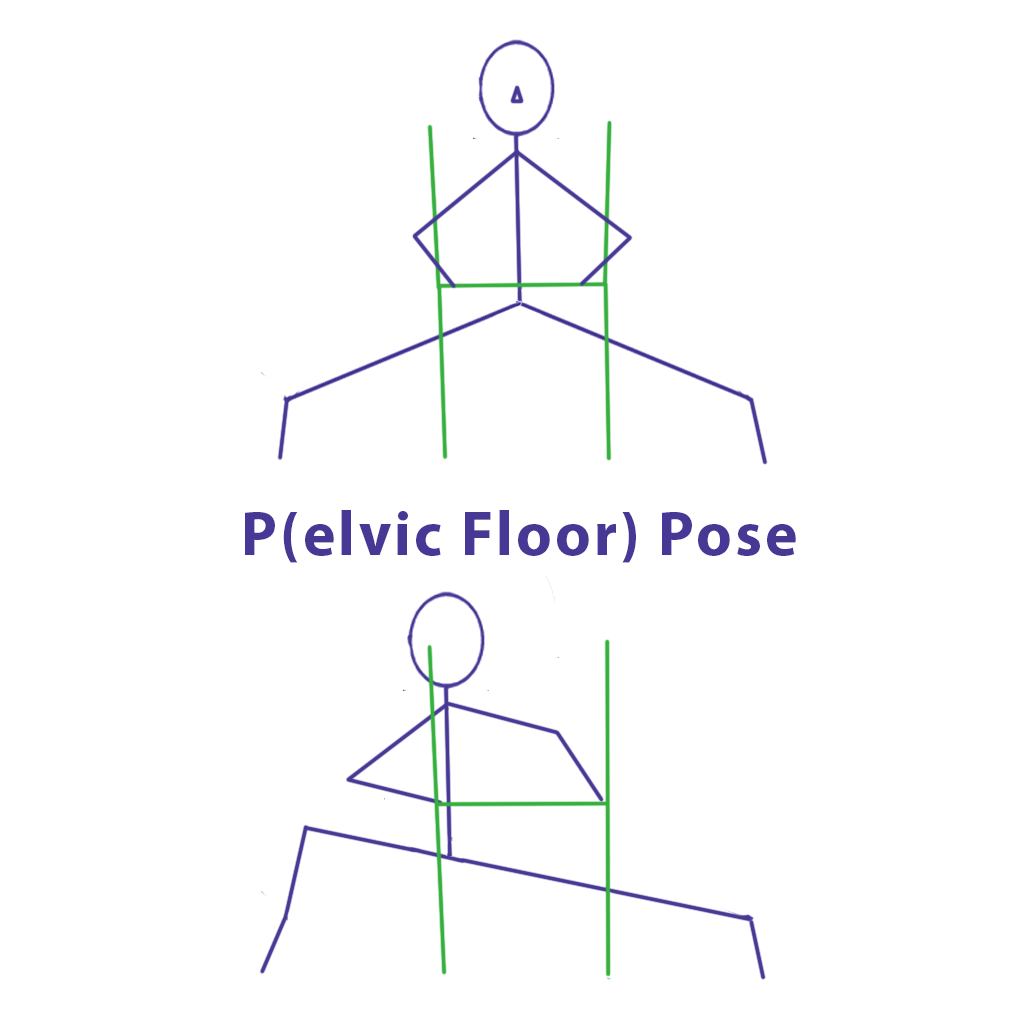
Check in with your comfort level and we’ll move on to another pose. If you are doing this pose, you’re going to bring your chair to the center of your mat. I’m just going to center my mat on the chair and you want to do the same. So we’re going to go wide. I want your feet to still be parallel.
00:12:43:15 – 00:13:06:01
This keeps your knees safe. You always want knees and feet going the same direction. So for you, you’re going to lean forward and hold on to the chair, but you can’t see what I’m doing. So I’m not going to do that. But I want you to try it that way. Little confusing, but I think you can handle it.
00:13:06:03 – 00:13:32:02
So I’m going to move the chair out of the way and I want to be at the back of my mat, only because I’m not using the chair. So when you do a wide stance again, feet are parallel to each other, you want to go as wide as you can and be comfortable. Once the hips start jamming up, that’s not really a flexibility issue.
00:13:32:07 – 00:14:01:11
That’s the head of the trochanter in a limited cup because it’s a ball and socket joint and you can only move it according to the structure of the hip cup. So when we do a standing forward bend, we still stick our bottom out. So inhale here and exhale down. Just stick the bottom out. Now, remember, you are going to take hold of the chair.
00:14:01:12 – 00:14:06:11
I’m just going to touch my fingers down.
00:14:06:13 – 00:14:16:14
Inhale. Here. And on exhale, bend one knee, forward and down you come. Try to keep
00:14:16:14 – 00:14:46:21
both heels on the ground. Especially this one, the bent knee heel. Inhale back up and exhale down again. Inhale back up and down you go. Inhale back up and down you go on exhale.
00:14:46:23 – 00:15:01:02
So I’m going to come up. I want you to try a few of those on your own. So pause the video and do as many as you like, and then start it again and we’ll continue.
00:15:07:08 – 00:15:48:13
So notice how you feel afterwards. Did you feel some tightness in the inside of your thighs? When we are told that we must sit with our knees together, the inner thigh gets tight, the outer thigh becomes too loose, and your pelvic floor is influenced by that tightness that pulls. So I like to think of this pose as stretching from the hip on this side all the way down to that foot and including the pelvic floor.
00:15:48:15 – 00:16:19:18
And so for that reason, one of my favorite students nicknamed this pose the pee pose, because pelvic floor flexibility and strength is going to let you almost always only pee when you want to, which is important. So to come out of this without undoing what all the good stuff we’ve done, you shift your weight to one side and jump it together so any way you come back together is fine too.
00:16:20:13 – 00:16:41:05
We’re going to go wide again and then turn one foot out. Really careful. Turn the other foot out. Pretty careful. Find your balance and then practice bending your knees.
00:16:41:07 – 00:17:00:13
You want your knees and thighs to point at your feet. This might seem a little bit tricky. And if you want to use the chair, you can. You can bring the chair in front of you like so and use it with just one hand for what we’re going to do. But let me show you what we’re going to do first.
00:17:00:13 – 00:17:55:10
This one’s fun. This one is my favorite stress busters. So we’re going to exhale here, inhale up big inhale. And as you come down, you’re going to stick your tongue out and say, “ha.” So inhale back up. Bigger breath, inhale back up. Biggest of all, arms down. Bend the knee when you want to turn the foot in, bend the knee, turn the foot in, shift your weight, jump them together, and then take a seat in your chair again, please.
Additional Spring Class 4 Resources
- In today’s pranayama section, we learned a technique called bhramari, or Bee Breath, that involves humming, which helps slow and even out the exhale and also creates a vibration that soothes the vagal nerve. I offered an option for covering your eyes and ears to help you turn inward and hear the hum. If you’re practicing for the first time, you’ll need to hear the audio so you may want to skip covering your ears, but if you want to try it on your own, here’s how the hand position works.


- In this week’s meditation practice, I take you on an “Awe Walk” and I reference Dacher Ketchner’s work entitled, “The Science of Awe”. Here’s a link to download that piece.
Comments or questions?
I’d love to hear about your experience with this week’s class and address any concerns you may have. If you’d prefer to reach out privately, send me an email at kath@kmkyoga.org.
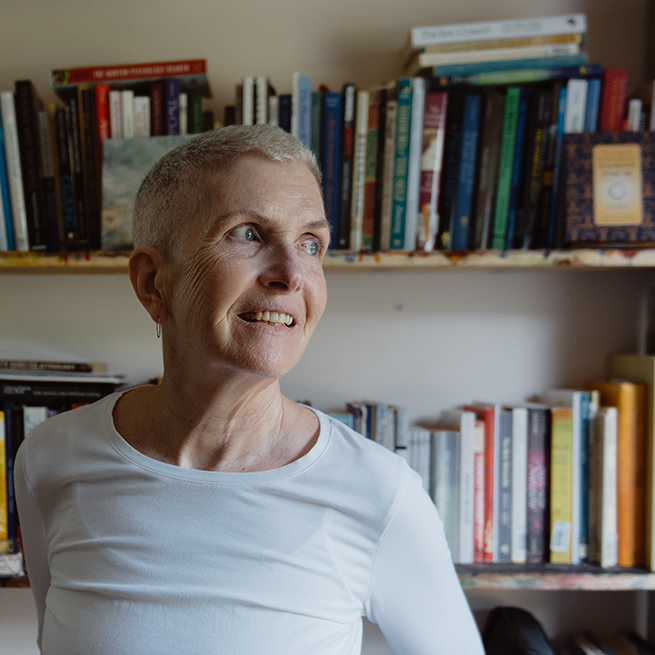
Hi, I’m Kath. I teach yoga, breathwork, and meditation as a path to greater somatic awareness and nervous system regulation. Through this practice, I have learned to care for myself so that I can live more peacefully and more purposefully in my body, my mind, and the world. Read my full bio here.
I created KMKyoga for people like me, who can benefit tremendously from yoga but need an option that doesn’t break their bodies or their budget. All KMKyoga classes and learning resources are funded by donations. Learn more.