Yoga for Nervous System Regulation | Spring Class 9
In This Series
New here? Read this first!
Yoga for Nervous System Regulation is a unique program combining yogic tradition with neuroscience to help students engage with the nervous system, calm stress responses, anda
Yoga for Nervous System Regulation is a unique program combining yogic tradition with neuroscience to help students engage with the nervous system, calm stress responses, and cultivate peace and resilience in body and mind. Learn more about the program here.
Here’s what you need to know to get the most out of this practice.
- Please complete the entire Spring Series in order before moving on to subsequent series, regardless of the current season. Each series builds upon the material covered in previous seasons, so doing them in sequence is important for your understanding and your safety.
- Yoga is best practiced on an empty stomach, which means no food for 2 hours prior and no beverages for 30 minutes prior. Follow your practice with food and plenty of water. Review the complete Yoga Safety Tips here.
- Each weekly class consists of a playlist of 3 practices to be completed in order. The asana (yoga poses) prepare us for pranayama (breathwork) which prepares us for meditation, which prepares us for life!
- This course is designed to accommodate a range of learning styles. Below the video playlist you’ll find additional visual aids and links to resources that enhance the learning experience.
- Yoga is a very individualized experience, and it’s normal to have questions or concerns. I would love to hear yours! Please submit a comment at the bottom of the page, or follow KMKyoga on Instagram, where I share additional insights, support, and resources with a growing community of fellow practitioners.
Thanks for being here!
cultivate peace and resilience in body and mind.
Learn more about the program here.
This program is seasonally oriented. Please begin with the first class of the current season. Each class consists of a playlist of 3 practices to be completed in order. The asana (yoga poses) prepare us for pranayama (breathwork) which prepares us for, meditation, which prepares us for life!
Pause the track and practice on your own when prompted, or whenever you need to. Below the video playlist you’ll find pose diagrams and descriptions, and additional resources to optimize the class for all types of learners.
I would love to hear your thoughts and questions. Please submit a comment at the bottom of the page, or follow KMKyoga on Instagram, where I share additional insights, support, and resources with a growing community of fellow practitioners.
Thanks for being here!
This week’s niyama is santosa, “contentment with what is”. It reminds us to gratefully work with the body we have now, nurturing it while honoring it’s boundaries. We’ll also practice chandra bhedana, a single nostril breathing technique associated with cooling and calm.
Remember, yoga is best practiced on an empty stomach. Review the complete Yoga Safety Tips here.
Please don’t hesitate to ask questions in the comments section at the bottom of the page, or by sending me an email at kath@kmkyoga.org. I’m happy to help with clarifications or modifications to ensure your practice is safe, comfortable, and enjoyable.
Find a quiet space with room to move. You may wish to pause notifications on your digital device. Gather your mat, a sturdy chair, some water, and a blanket. When you’re ready, hit Play on the first video in the playlist – asana – to begin.
Enjoy your practice!
In This Series
This course is provided on a pay-what-you-can basis. If you value what you find here and want to contribute, make a donation. If you’re not able to donate today, please join us for free.

Get course updates, news, and insights about yoga, meditation, neuroscience, and more in your inbox.
Spring Class 9 Video Instruction
Each class playlist consists of three videos to be practiced in order:
Asana ➙ Pranayama ➙ Meditation
The purpose of asana (yoga pose or “seat”) and pranayama (breathwork) are to prepare the body and mind for meditation, where the real magic happens! I strongly suggest you try the classes in sequence, but after you’ve completed the entire sequence at least once, feel free to revisit individual parts as you’d like.
Once you complete a video, the player will automatically advance to the next one in the playlist. You can skip to the next video at any time using the next/previous arrows at the bottom of the player window, or by clicking the icon in the top right corner.
Asana (Pose) Descriptions
The following diagrams are offered as a supplement to today’s asana practice. Use them to quickly reference specific poses in the video, review verbal instructions in written form, and clarify details from the class. Scroll within each text box for transcript excerpts with time stamps indicating when each pose is demonstrated in the Asana Video for today’s class.
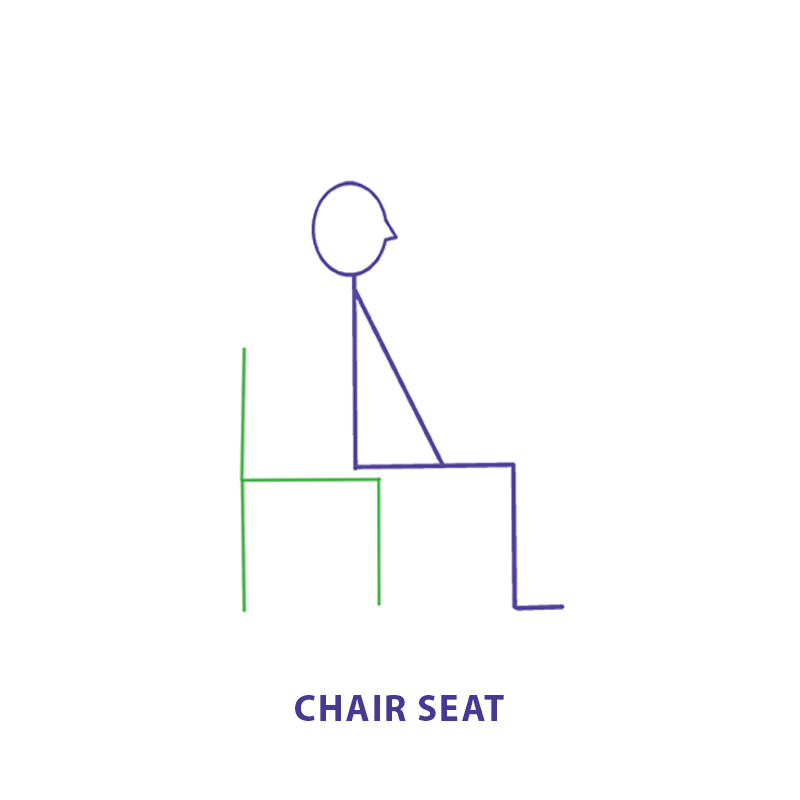
00:04:16:07 – 00:05:03:18
Exhale here and then turn your hands and inhale up and exhale down. Inhale up and exhale down. Please pause the video and try a few of those on your own. Just enough to see if your upper back is happy with the practice. And so take a moment to notice. Notice what’s going on in your shoulders, arms, neck, upper back, chest.
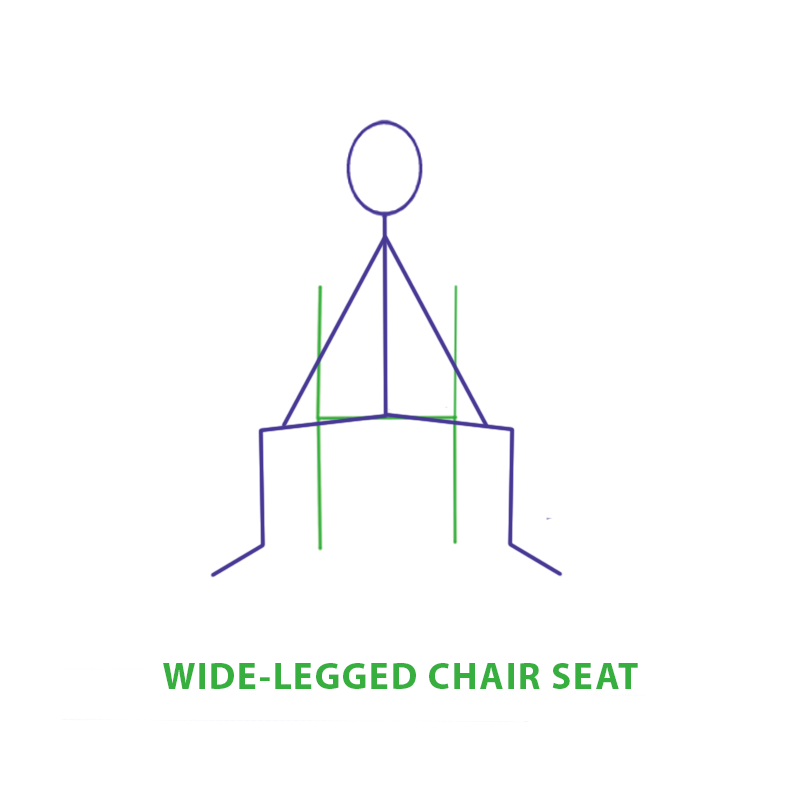
00:05:03:20 – 00:05:27:11
And then we’re going to go wide, check out our low backs. You can use your hands to help keep the knees apart, too, until you have a fair amount of flexibility in the inner thighs. Bending forward is going to make your knees want to cave in. Try to resist that by holding on with your hands and keeping them separate.
00:05:27:13 – 00:06:08:19
So we inhale here and – hinging at the hips – exhale forward, elbows bend, down you come, let your head hang, let your neck be limp. Bring your attention to your low belly as you take a big inhale, exhale, release the belly and low back will lengthen and stretch a little bit. Bring your attention to your upper belly and on exhale, soften that line from the tailbone to the bottom of your ribs.
00:06:08:21 – 00:06:51:05
Then focus your attention on chest and shoulders as you inhale and on exhale, soften the whole spine from tailbone to head. Let your head hang limp. Take a big inhale here, exhale. Soften the whole front of the body so the back of the body can hang and then straighten and inhale up. Take a moment. Notice your back. Notice body.
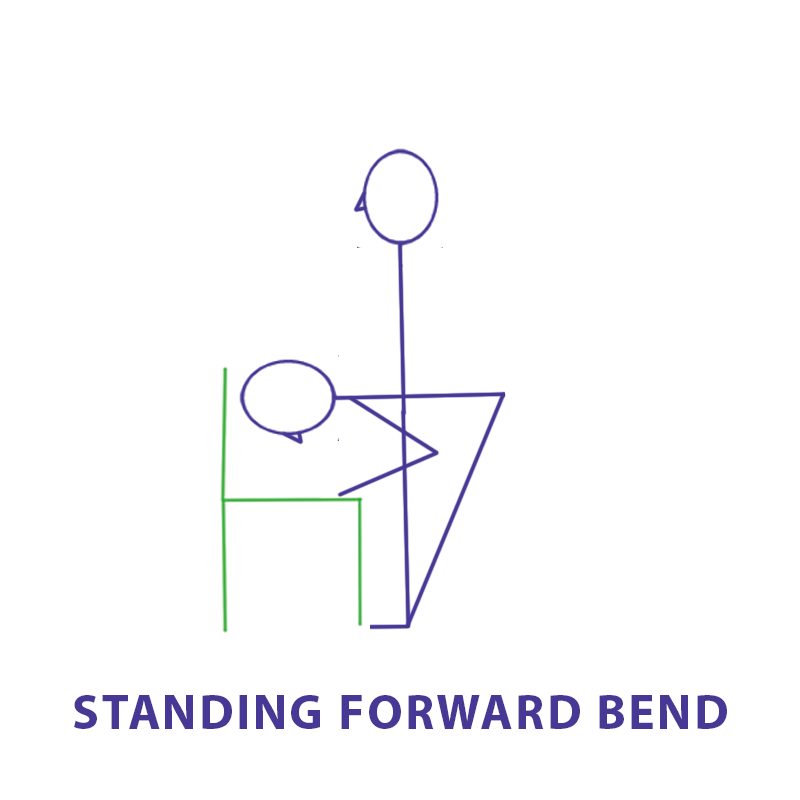
The mat needs to be anchored down with your chair and the back of your chair needs to be against a wall or a sturdy piece of furniture so that it doesn’t slide out.
00:07:32:17 – 00:08:04:14
So you might remember from lesson seven, week seven that we counted our breaths while we were lowering knees to one side to see how the effort of moving just the knees up and down challenge your breath, to begin to notice your breath during exertion. We’re going to add that to forward bend now. So what I’d like you to do is come into the forward bend position, which is knees and feet, hip width apart.
00:08:04:14 – 00:08:38:10
Knees are close to your chair and take a moment to notice the breath you have. Remember, we count it like we count thunder and lightning. One and two and three and four. Count the breath that you have at rest. Inhale and exhale. So with that awareness, whichever number was longer, probably your exhale is a little longer than your inhale.
00:08:38:12 – 00:09:05:14
You can use either one. Start with the short one and then work on the longer one. But it would look something like this. We won’t bring the arms up for this one because we’re going to keep it as simple as possible. Inhale here. Let’s imagine the count was four. Inhale here, and then exhale one, two, three, four. Inhale up.
00:09:05:18 – 00:09:30:02
One, two, three, four. I want you to try a few of those. Keep the count the same as long as you can. And notice how movement affects your ability to sustain the breath ratio, the breath amount that you start with at rest. So try: you pause the screen and try a few of those.
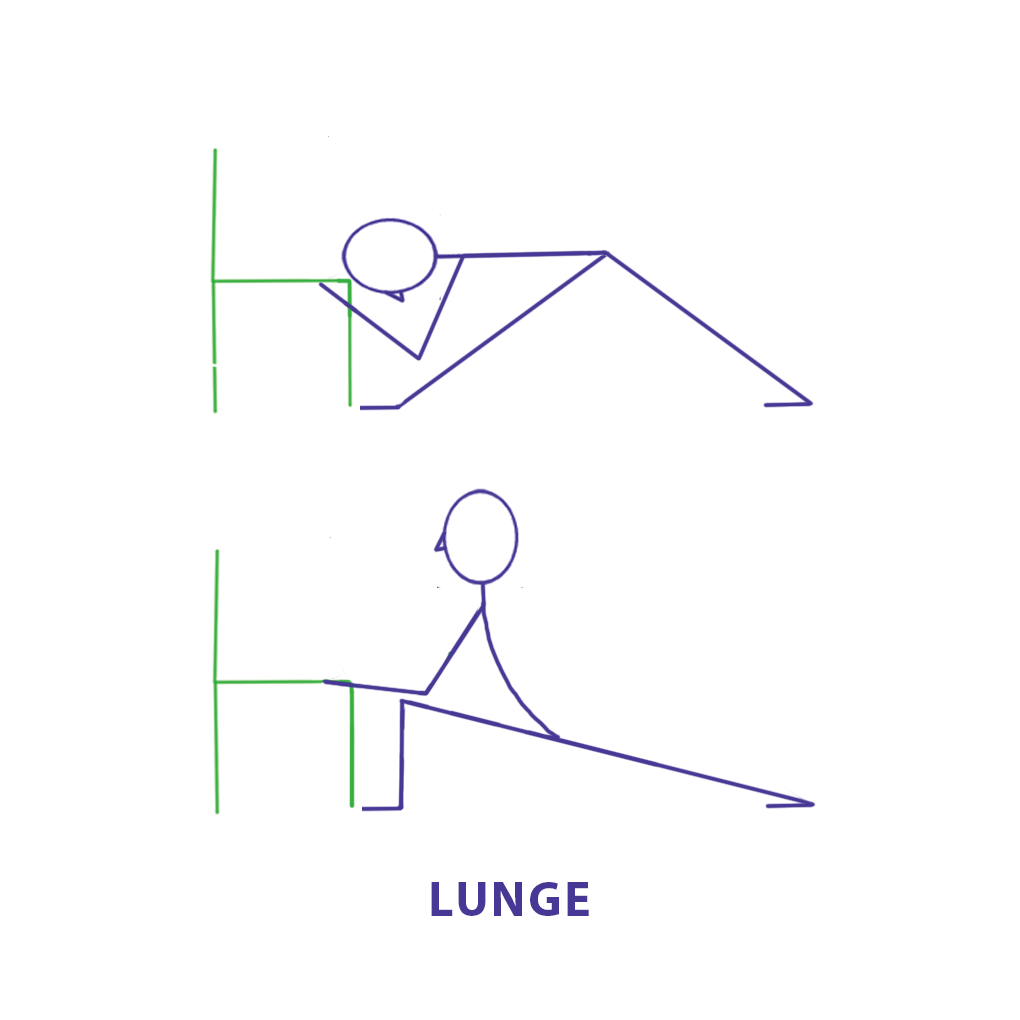
00:09:38:05 – 00:10:02:08
So notice how you feel. It’s a little more of a challenge. We’re used to moving and we’re used to breath being unconscious. And what I’m trying to help you do is bring those two things together that you can be conscious of breath within movement. So whatever your number was, let’s try it with the lunge. That’s a little bit harder.
00:10:02:10 – 00:11:02:06
So in. I’ll stay to a count of four. Inhale. Here. Exhale. Two, three, four. Inhale. Two, three, four. Exhale. Two, three, four. Inhale. Two, three, four. Exhale. Two, three, four. Inhale, two, three, four. Exhale. Two, three, four. Inhale, two, three, four. If the lunge feels too complicated for you to count your breath while you’re stepping back, you can do another series of forward bends. That would definitely give you the same amount of information.
00:11:02:08 – 00:11:22:18
But if you want to try the lunge, it’s kind of fun. So do a few of those at your pace. Remember, I don’t want you to become breathless. I don’t want you to be uncomfortable in your breath. Do the best you can. And if that poses any problems, I hope you’ll leave a comment or send me a message talking about it.
00:11:22:18 – 00:11:25:07
But give it a try. Please.
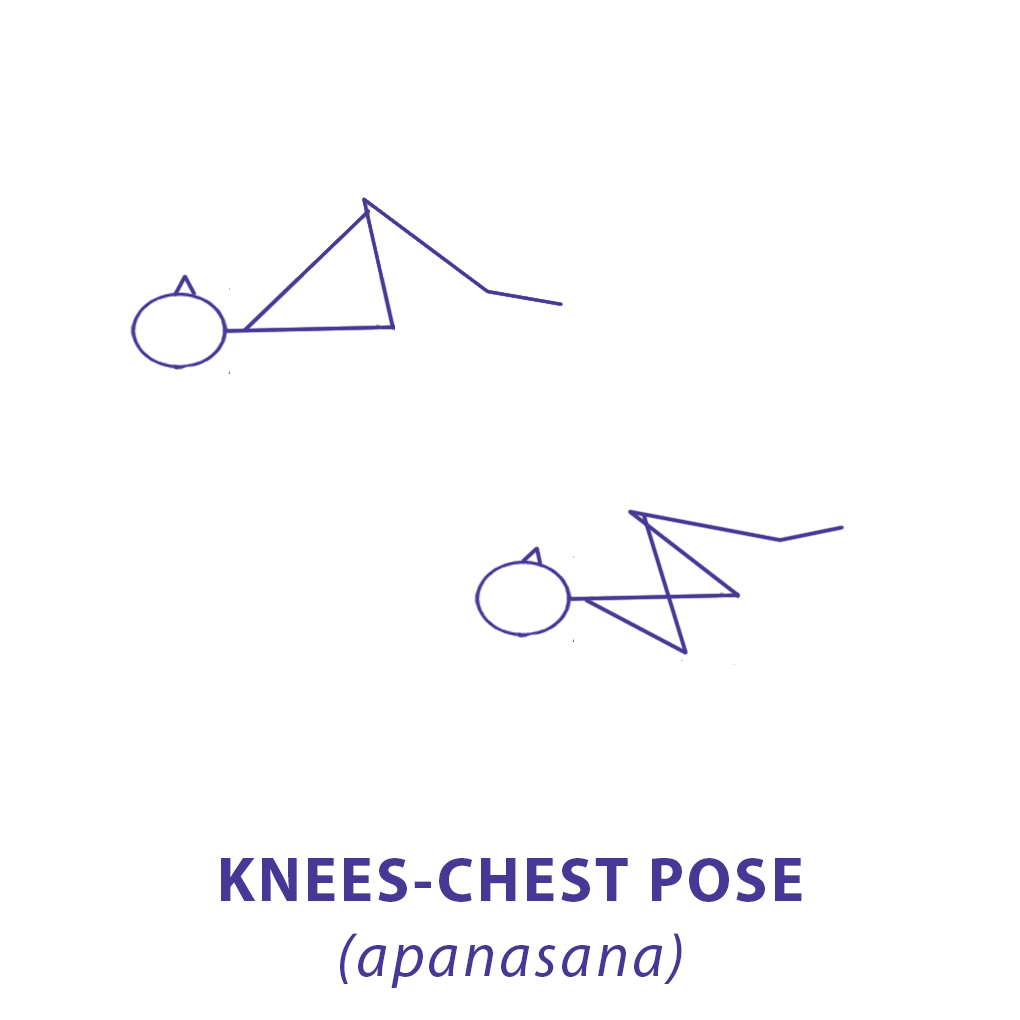
00:11:34:09 – 00:11:53:19
So notice, I’m always going to say that. Notice how you feel. Do a little body, scan toes to the top of your head and notice. And then let’s come to lying on the mat again.
00:11:53:19 – 00:12:11:14
Flat on your back. Flatten your back by bringing one knee over the chest. And then also the other. Your fingers are in your knee creases, rock back and forth until your back is flat.
00:12:11:16 – 00:12:49:12
And then down and down. Take a moment, lay your hand across that little triangle and notice the breath and movement from standing to lying. Probably increased your breath a little bit. As you watch in this position, you can feel your breath slow down. Once it’s a little bit slower, check out the count you have now. Because we’re lying down
00:12:49:12 – 00:13:19:12
the count might be a little higher. When I say might be, that’s not a goal. That’s just a possibility. Please be content with the breath that you have. I’m going to use a five count this time because usually my breath count is a little higher when I’m lying down. So we’re going to take the arms out again, walk the knees and feet together, inhale in this position, and exhale down for the five count.
00:13:19:14 – 00:14:06:17
Exhale. Two, three, four, five. Soften your belly. Inhale. Two, three, four, five. Exhale. Two, three, four, five. Soften your belly. Inhale. Two, three, four, five. Exhale. Two, three, four, five. Inhale. Two, three, four, five. So I used a five count, but I want you to use your count. What you found was your number maybe three, four or five.
00:14:06:18 – 00:14:24:19
Don’t go higher than five, though. Five is a good number. Try a few of those on your own and notice how you feel while you’re doing it. Because you know I’m going to ask afterwards. So pause the screen and try a few of those at your pace.
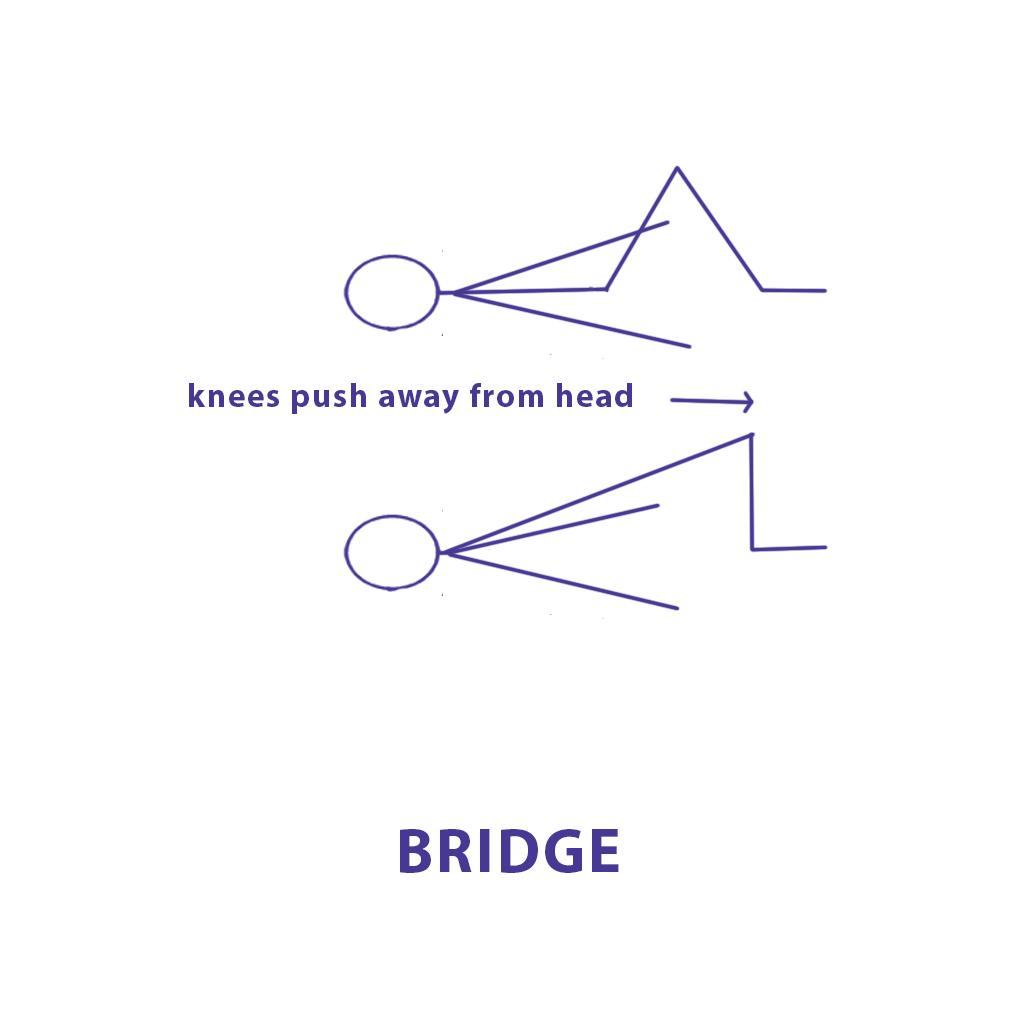
00:14:32:21 – 00:14:57:04
So take a moment to notice how you feel. Remember, if you’re … you don’t ever want your breath to become labored or frantic or very fast. But you can notice the changes that happen as your breath is experienced throughout movement. So take a moment. Do your little scan.
00:14:57:05 – 00:15:06:15
Notice how your breath is reacting right now.
00:15:06:17 – 00:15:30:05
And then I’m going to put breath into the bridge pose that you learned. And if this is too much, I want you to go back and practice the bridge pose a few times without the breath count. The breath count is an additional burden, in a way, an additional challenge. So if this is hard, please go back and find a comfortable spot.
00:15:30:07 – 00:15:58:10
So my knees and feet are hip width apart, arms palms-down alongside my body. We begin by pushing the feet in to flatten the low back, push the feet down into the mat; inhale you release the feet and the tailbone rocks down. Press down with the feet and the low back presses against the mat. From here, I’m going to …
00:15:58:12 – 00:16:32:19
I’ll use a count of three for this one, because this pose is sometimes a little harder for folks. So exhale. Inhale. Two, three, exhale. Two, three. Inhale, two, three, exhale, two, three. You’re still coming down one vertebra at a time, and you stop when your low back or your butt hits the ground. So it’s inhale. Two, three, exhale, two, three.
00:16:32:21 – 00:16:46:17
Try a couple of those on your own and be prepared to notice. If you notice throughout, you’ll have your answer when you’re done. So pause the video and try a few of those, please.
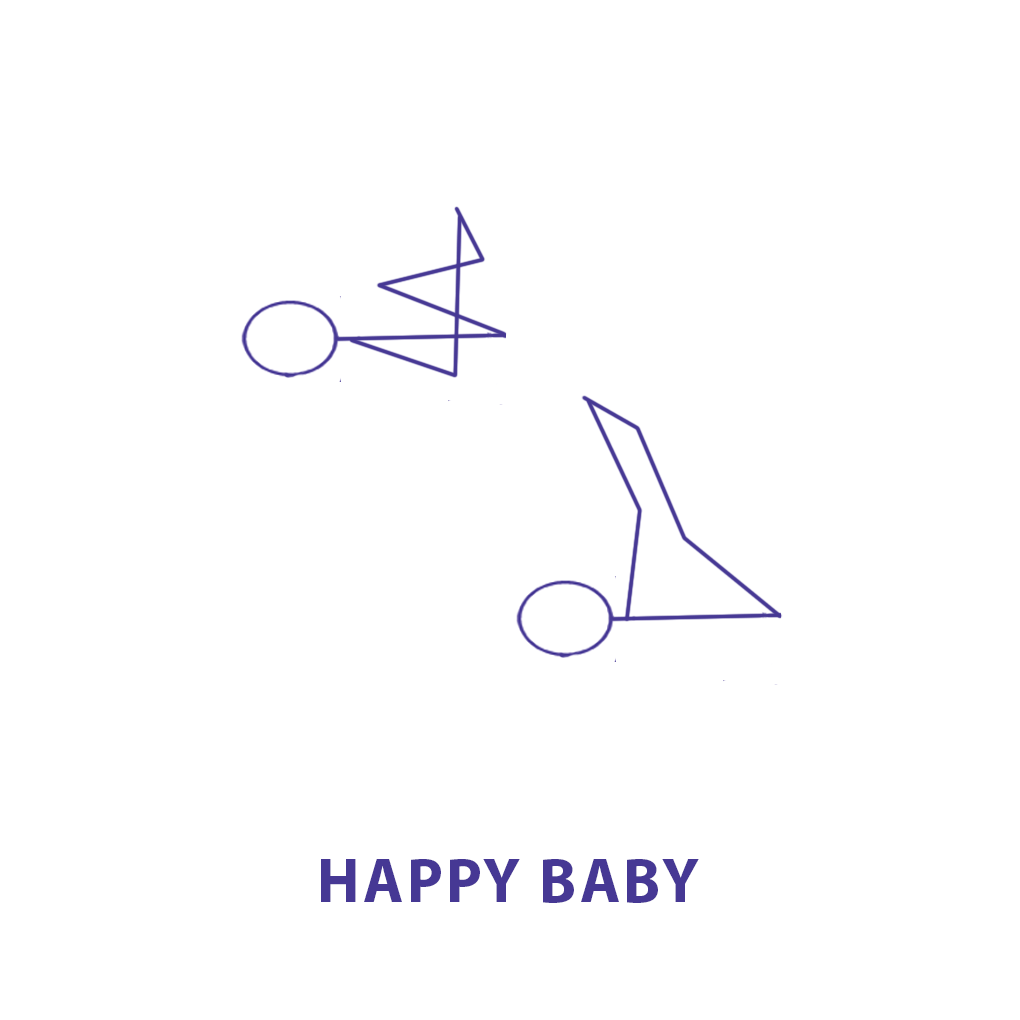
00:16:55:23 – 00:17:13:13
So how did that feel in your body? Was it hard or easy or somewhere in between? Maybe just comfortable and moderating the breath to go along with that movement?
00:17:13:15 – 00:17:43:13
Notice and then bring one knee over the chest and also the other; rock back and forth. This next pose is it’s almost silly, but it feels really good too. So my knees are about hip width apart. I’m going to reach one hand in the middle and use two fingers to take hold of my big toe. If you can’t reach your big toe, you can hold on to your ankle.
00:17:43:18 – 00:18:16:20
You can hold onto your heel. You can even hold onto your thigh. So hold on to something below your knee. Do the same with the other. I’m reaching inside, not outside. Inside. And then stretch the legs out straight as best you can. Stretch out one leg, stretch out the other. You can soften the foot and feel the stretch across the heel where your plantar fascia attaches.
00:18:16:22 – 00:18:22:01
Do that on both sides. Stretch out the legs. Feels good.
No special breath pattern. It’s just a really nice stretch.
00:18:27:19 – 00:18:48:19
With the legs both straight, you can rock a little back and forth and feel your spine against the mat, almost as if you’re giving it a little backrub side to side, and then let go of one foot hand in the knee crease, let go of the other foot, hand in the knee crease, and give yourself a few back and forth.
00:18:48:21 – 00:19:23:12
Inhale away. Exhale in. And remember, knees can be together, shoulder width apart, or wider than torso width apart. Whatever feels best in your lower back. Exhale in and give a little pull. Try a few of those at your breath. Pace and then bring one foot down. Bring the other foot down.
00:19:23:12 – 00:19:46:13
So remember: to come out of lying in a supine position, wrap your right arm around your head and roll over onto your right side. Take a moment, then put your hands down and use them to push up to a seated position. At this point, you want to check. You don’t want to be dizzy.
00:19:46:13 – 00:19:55:09
If you are, a couple of deep breaths will do it. And then whenever you are ready, you can use the chair to get up,
00:19:55:09 – 00:20:02:20
bring one foot forward, and then also the other.

00:20:02:20 – 00:20:26:02
So santosa: content with what is. You’ve explored a little bit about the breath and movement that your body are capable of right now, and I’d like you to begin to embrace that in a way that’s authentic.
00:20:26:06 – 00:21:12:11
Respect your body. Let’s do a little breath awareness practice to close out. So take a long, gentle inhale that makes you taller. And on exhale, close eyes. Bring your awareness to the breath in your nose and on exhale soften your cheeks, forehead, and the little muscles around your eyes. Bring your attention to the breath moving through your throat and on exhale, soften the space between ears and shoulders.
00:21:12:11 – 00:21:21:01
Let your neck be long and supple. Chin might come up a little.
00:21:21:03 – 00:22:11:08
Bring your attention to the breath moving your chest and, on exhale, soften that shoulder-arm connection so that your arms can be more limp and soft. Bring your attention to the breath that moves your belly. And on exhale, soften that hip-leg connection in a way that lets your hips just balance your torso right from the tailbone up. And then bring your attention into that little triangle where you can feel or from externally or internally, you can feel your diaphragm moving.
00:22:11:13 – 00:22:37:05
Watch your diaphragm go up and down for a few breaths. Watch your whole torso breathe, and with your next inhale, bring eyes open.
00:22:37:05 – 00:23:07:18
So that concludes class number nine for asana. I’d like you to go on to Pranayama Week nine and then meditation Week nine, content with the body that you are developing and a more deep and lasting relationship with by using breath as the microphone of the body to let you know what’s going on in your own nervous system.
Additional Spring Class 9 Resources
In today’s pranayama, we practice chandra bhedana, a single nostril breathing technique that uses the same hand positions as nadi shodhana breathing. Review this video for a refresher on how to do that.
Comments or questions?
I’d love to hear about your experience with this week’s class and address any concerns you may have. If you’d prefer to reach out privately, send me an email at kath@kmkyoga.org.
Hi, I’m Kath. I teach yoga, breathwork, and meditation as a path to greater somatic awareness and nervous system regulation. Through this practice, I have learned to care for myself so that I can live more peacefully and more purposefully in my body, my mind, and the world. Read my full bio here.
I created KMKyoga for people like me, who can benefit tremendously from yoga but need an option that doesn’t break their bodies or their budget. All KMKyoga classes and learning resources are funded by donations. Learn more.